This project began as a request from my producer at work Brain, it was if we (the graphic artists) could model and 3D print a figure of one of our talent for an awards show he was producing. This model would have to resemble the main talent of the show and look like an actual gold trophy. I was one of the three artists working on the project.
To read a quick bullet point summary(tldr) jump to the end.
 We began by brainstorming ways to capture the talent that could be easily translated into a 3D model for printing. My first thought was to use a program by Autodesk called 123D Catch to get the best representation of our talent for our model. Unfortunately we did not have direct access of our talent, and although we where able to get pictures of the talent from various angles of the chest and head it was not enough for the application to process and create a model for us.
I also looked into some alternatives that would work like the Autodesk application but with less proprietary restrictions. I found a good blog post on ditching 123D Catch however the application, insight3d, seems to work better for interiors and exteriors then people. Another alternative was FaceGen which was mentioned and used in a CorridorDigital video, but the cost for this application was not in the budget.
What we did use, as suggested by my awesome co-worker Caresse, was Makehuman. This open source application lets you easily create realistic characters.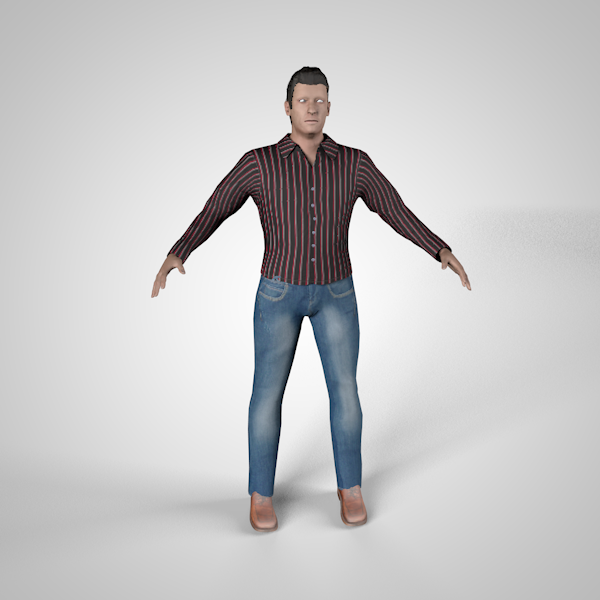 Age, weight, eyes, nose, body proportions, and more can all be easily adjusted using sliders. Caresse worked with the producer Brian to get the model as close as possible to our talent. This took a bit of back and forth to get his likeness into the model and even after we were done using the application we still had to do some manual tweaking of the model to get it to look just a bit closer to our talent.
The next step was to pose the model for the final 3D printing. Fortunately MakeHuman exports the model with a full skeletal system that is already skinned to the character. I was able to add IK(Inverse Kinematics) to the arms that allowed me to easily pose the model’s arms. I had IK on the legs as well but I took them off since the pose for the legs was simple and did not required them to be bent. Having IK on the arms turned out to work well since the original pose was to have the arms crossed, but since it looked awkward we opted to have the arms out one holding a stopwatch and the other holding a clipboard.
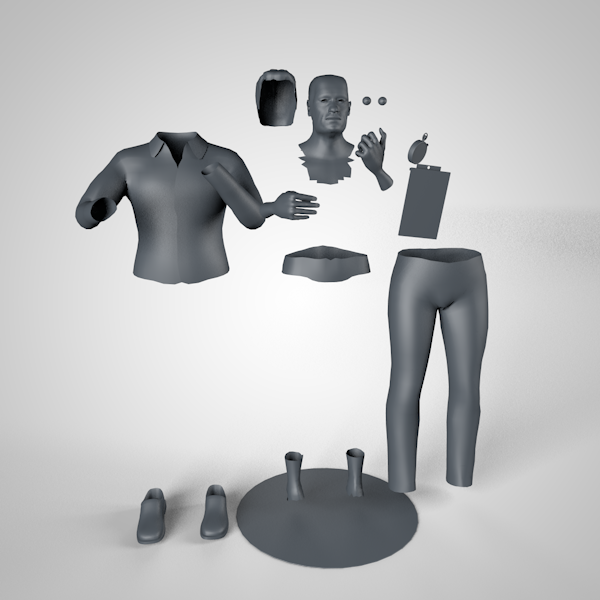
After locking down the pose, we proceeded to prep the actual model for printing. This required us to connect all the parts of the model together to make it one whole piece. This was probably the most tedious part of the whole process. The head/neck, shirt, arms, pants, ankles and shins, and shoes all needed to be connected to each other to make one piece for printing.
Next after combining all the parts was we added a base and optimized the stopwatch and clip board for printing. The model however would still need some more tweaking once we tried to get it printed. We also tried to use the sculpting tools in Cinema 4D to add some extra detail in the model. They looked great but when prepping the model those parts did not hold up well in the printing system checks so we removed those details.
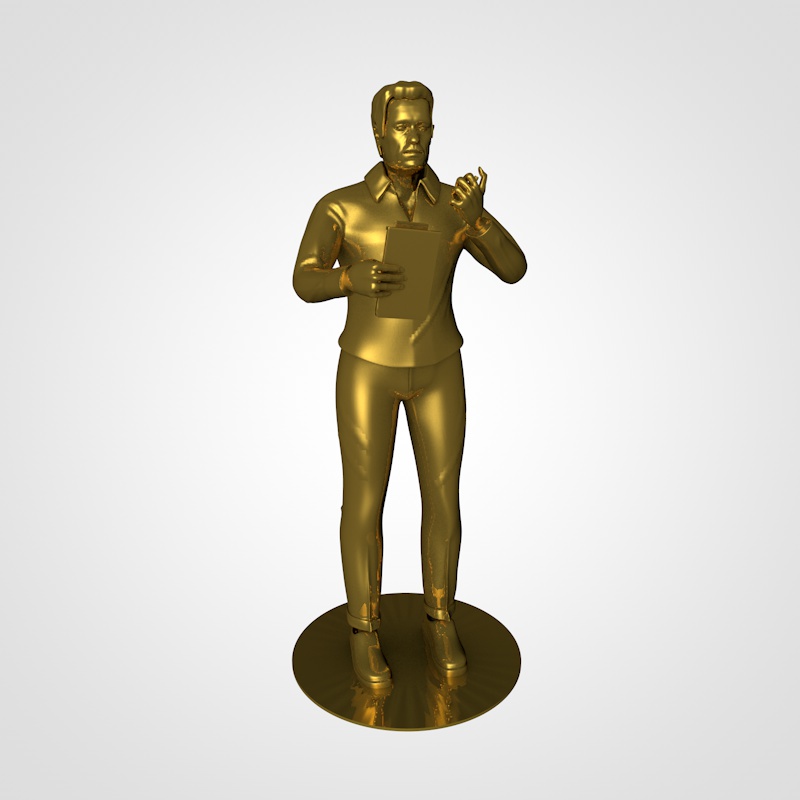 At this point we had a good model that we could do a quick rendering of to show what we had been working on for the past couple weeks. We also were ready to start uploading it and seeing what we would get back as far as printing quality and integrity. My first thought was to use Shapeways since they have printing for 6 days if the model print size is under 200mm(20cm/7.87”). Although our originally goal was for print size to be between 9”(22.86cm)-12”(30.48cm) high figure, my producer said that the size limit would be fine if it would come in on time. However the estimated ETA for arrival was longer then expected so we could not use them.
I started to look for alternatives that would allow us to make our deadline. I found a number of sites online and most where priced around the same as Shapeways. The top two that I found that where the closest was i.materialise.com and sculpteo.com. Both had pricing similar to Shapeways for the size we wanted to print, but Sculpteo had more tools for fixing and reviewing our model using their system that made it the front runner of the two.
Between the two of them I uploaded over 40 different model versions tweaking the geometry to attempt to fix any issues that may arise during the printing process. I had an especially hard time with the thickness of many parts of the model that did not meet the minimum required thickness. The collar and thin parts on the stopwatch and clipboard where always giving me issues. Luckily with the print being rather larger most of the small parts would be larger enough just because of the print size otherwise I would had to figure out some other solution.
While working with these online solutions I was also still searching for a local printer in NYC to use as well since I thought that would be a good option and being local would help with delivery time. I was able to find a 3D printing place local to NYC and we were able to get in contact with them to discuss the project and had them print out an 8” figure of our model. There was one caveat though, and that was they did not have their ABS printer working at the time so we had to use their Sandstone 3D Printer. Which is not the worse option and has the ability to print in color, but is more fragile then ABS or PLA plastic material.
We went with this local printer for the company model, however as a back up I had two other models commissioned for printing via the website 3dhubs.com. This site lets you connect with 3D printer owners directly to have them print your 3D model for a fee. You can easily upload your model have it system checked for printing and priced out. Then you can search for a printer locally and either pick it up or have it shipped to you. An awesome idea that is just starting out but seems like it will have future with the growth of 3D printers.
I choose three printers local to New York City and sent them a preliminary request about my deadline and a preview image of my print. I received responses from two and choose to have a print made with both of them. One of them unfortunately had an issue with their printer, so mid print their printer broke down with some technical problems so I could not get a print from them. I did however get a clean print from my other hub, which was Peerless’s Hub. If you want read my experience working with this hub check out my review on his hub, but to sum it up I had a great experience working with them. I also used a different material for the print as well, using Makerjuice G+, which I had never used before but is similar to PLA.
Now began the waiting process as the prints where completed. This was one of the more nerve racking parts during the project since it was all in the hands of the printers and we had to trust that they would produce our model in the time we needed it. I was kept update with my prints fairly regularly from the 3D hubs printer and knew of any issues that cam up during the printing process. From the NYC local printer not so much but both arrived in time for when we needed them to.
Through out the whole process we had been discussing at the same time how we would would actually paint our model to make it resemble an actual gold trophy. I did a lot of research on how to paint on 3D printed plastic as well as other figures. I also did some searching on what would be the best type of gold spray paint to use to get the best looking gold items as well. The video links were especially good to actually see how the paint looked when applied to an objects. They also helped me determine the final paint that I would get which was Rust-Oleum 1910830 Metallic Spray Gold & Rust-Oleum 7710830 Bright Coat Metallic Color Spray Gold both 11-Ounces. The first one I used on the backup and the second on the sandstone model.
- Gold Options
- Painting Resources
All of this researching was good but it didn’t nearly help as much as asking someone who had years of experience actually doing production work. This is when I asked around the graphic artists at work if they knew about spray painting. Neil, who is a newer addition to our group at work, had years of experience working in production and graciously lent his expertise to our project. Using him as a resource I was able to determine not only some more material I would need to buy but also some techniques for painting. He pretty much did most of the priming, painting, and lacquering of the company model that was eventually used in the show.
The process was for making the models look like gold was fairly straight forward. On my backup model I did not use the primer and simply applied the gold paint directly to the model doing 2.5 coats. I would have done a full 3 but I ran out of paint due to my earlier tests I did. These test lead me to believe that I could paint directly on the model without primer.
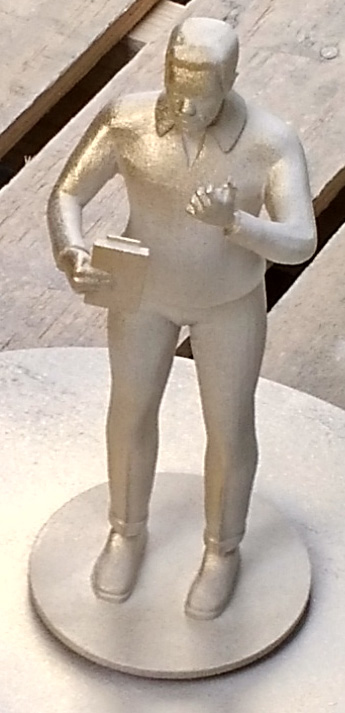 That was not the case with the work version that was sandstone. After testing it we decided that the sandstone was to porous and would required a few coats primer before applying the gold. We also where concerned that to much of the grain from the sandstone would show through the paint. It does show as you can see but it does add a nice feel to it that wound up looking nice for our purposes. I still like my version of the model a bit better since it has the nice clean shiny look of an actual trophy.
The last step we had to do was to apply the models to our base which was a plastic mirror riser that I found on amazon. We went through a few options to find one that we thought work well since we decided not to go the traditional route with a wood or marble-esqe base that is normally used. We applied it to the base using some 5min epoxy that I brought from home.
The next day they used the model on the show and even did a close up on it which made me cringe just a bit. Overall though it worked well as a prop on the set and looked pretty official looking despite being built in just few weeks. I wasn’t scheduled to work when the show was recorded by my producer was kind enough to give me a DVD copy of the show. We also did some other graphics that feature the trophy throughout the show as well.
My last thoughts about the whole process are about how cool it was to do a different type of project then what we normally work on. It was quite an experience working on making physical object as it did the previous times I have. It definitely makes you think about your modeling process differently especially in regards to how scale is so important. And as always I wish we had more time, particularly working on the design of the model. We got a few comments on his pants legs, looking like high waters a bit, and on the shape of his hips. Both could be fixed if we had the time to review the model a bit longer before trying to get it printed but we had to make our deadline.
It was a great project to work on and I’m glad we got the chance to work on is despite the concerns of our manager saying the project would take too much extra time(which it did) to complete it.
Lessons Learned
- Take more time making your model as good as you can before print prepping
- Be prepared to do some more iterative tweaks to get your model ready for printing
- Research your 3D printer thoroughly and choose wisely, especially if you have a deadline to make
- Have a solid location for the painting process and letting it dry in a ventilated area.