This project was inspired by a lot of the fpv flying I have done recently. I wanted to create something that tried to convey fun playful energetic feel of flying in the air.
I used Cinema 4D as my main tool for creating this project starting with the drone model which was based from my personal favorite one(that currently isn’t working of course).
In addition to modeling the drone I also went the extra step to make the propellers actually spin the way the would in real life. This was just a side personal exercise I wanted to try to see if I could do it via expresso inside of C4D. It took me a while and doesn’t show up in the animation since everything is moving too fast but I posted how it works on my instagram.
The city was a free download from 3docean that was the initial jump off for this project. After building my model I then figured out how to procedurally create the city using mograph in c4d. Allowing me to randomly place and distribute the city buildings. I didn’t use all of them in the pack but the most of the taller ones and few shorts ones. I added in some small parks to break it up a bit and to have some low flying action.
I wanted the whole project to be a bit more stylized and not super realistic so I went with the sort of low poly style which I think worked well and adds a fun feel to it. Also low poly is slightly easier to work with though the end it took decent amount of time to get it feel right.
After getting the look down I proceed to make the path that I wanted to fly the quad. My process for this to start in park and just places instances of the quad though out the city of the path I wanted it to take, pretty much blocking the path out as I came across the next building. Most of the moves are I’ve seen various popular fpv/drone youtubers do.
After laying out the path, I actually typed up an outline of the path so I could remember what moves I actually wanted to do, while labeling them in c4d as well. Then I made a spline path in c4d for the quad to follow.
My first path of animating it was attaching the quad to the spline but it felt too much on rails(which is was, the spline). So I ended up animating the whole thing by hand. I think the end result turned out pretty good though I still notice a few unintended extra moves I could have smoothed out. Some I left in since it seemed a bit more realistic or how I would try to recover from a move.
Before rendering it out I had the idea to add in some 2D effects to spice it up a bit. I have some 2D flash effects and thought I would composite them into the project in post in After Effects. But I didn’t want to have to export extra 3D data or do a lot of masking in AE.
So I rendered out png sequences of the effects and placed them in c4d on planes and other simple shapes and timed them with the quads moves. It came out pretty though I had to remember to turn the effects off after the animating other wise it would show up as black over other parts even if it had alpha at the end.
The final render time was probably around 15 hours between my two machines not included some re-renders of a few shots I messed up on. Also had to fix one shot that I messed up an an effect that a friend noticed.
After doing a bit of compositing in After effects I rendered out the 6 camera shots and the main First person view from the drones perspective and edited it all together in Adobe Primer Pro and added the final look. I did the final sound design in Audition. Overall it took me about 40 – 60 hours to complete over a 2 weeks though most of it was completed in the final week.
About 4 months I was contacted through Envato Studio, formerly microlancer, to do another 3D Logo Design. This will be the third job that I have received through their service and unlike my earlier jobs this one was a bit more of a custom job.
The client wanted the 3D version of their logo to be a bit more than just a flat extrusion of their vector file. So I actually modeled a 3D head for logo instead of just extruding out the shape of it. Everything in the logo is model as a full 3D object except the text and the “reel” scarf.
That was an extrusion so that it matched up more with the illustrated logo. The idea for this logo later was that it might transition from the 3D version to the 2D version and would need to match up pretty closely to make it as seamless as possible. I also had another version where scarf was mirrored on both sides, which looked “cooler” in my opinion, but wouldn’t work for its final purpose.
After a few revisions I was able to end up with a version of the logo that client like that fulfilled all of their request.
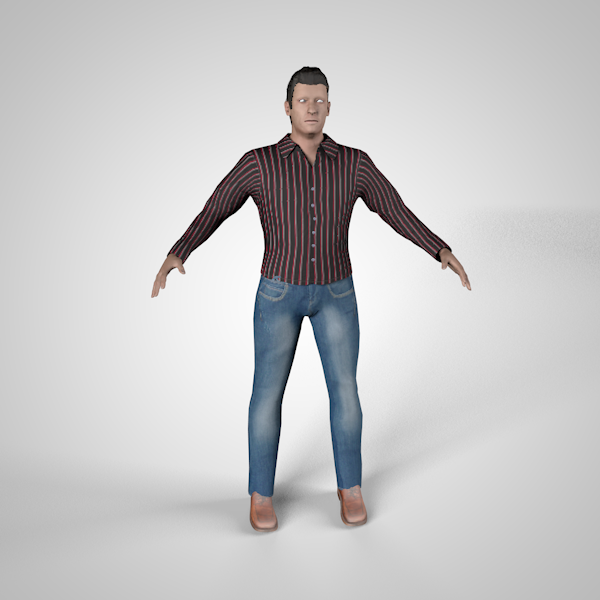
This project began as a request from my producer at work Brain, it was if we (the graphic artists) could model and 3D print a figure of one of our talent for an awards show he was producing. This model would have to resemble the main talent of the show and look like an actual gold trophy. I was one of the three artists working on the project.
We began by brainstorming ways to capture the talent that could be easily translated into a 3D model for printing. My first thought was to use a program by Autodesk called 123D Catch to get the best representation of our talent for our model. Unfortunately we did not have direct access of our talent, and although we where able to get pictures of the talent from various angles of the chest and head it was not enough for the application to process and create a model for us.
I also looked into some alternatives that would work like the Autodesk application but with less proprietary restrictions. I found a good blog post on ditching 123D Catch however the application, insight3d, seems to work better for interiors and exteriors then people. Another alternative was FaceGen which was mentioned and used in a CorridorDigital video, but the cost for this application was not in the budget.
What we did use, as suggested by my awesome co-worker Caresse, was Makehuman. This open source application lets you easily create realistic characters. Age, weight, eyes, nose, body proportions, and more can all be easily adjusted using sliders. Caresse worked with the producer Brian to get the model as close as possible to our talent. This took a bit of back and forth to get his likeness into the model and even after we were done using the application we still had to do some manual tweaking of the model to get it to look just a bit closer to our talent.
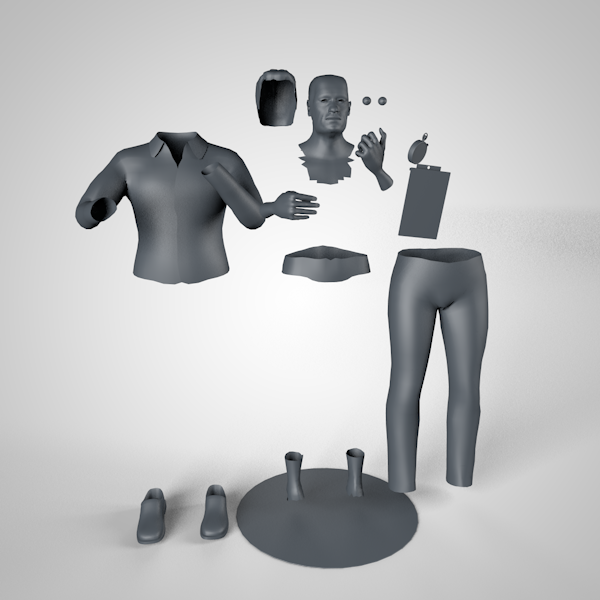
The next step was to pose the model for the final 3D printing. Fortunately MakeHuman exports the model with a full skeletal system that is already skinned to the character. I was able to add IK(Inverse Kinematics) to the arms that allowed me to easily pose the model’s arms. I had IK on the legs as well but I took them off since the pose for the legs was simple and did not required them to be bent. Having IK on the arms turned out to work well since the original pose was to have the arms crossed, but since it looked awkward we opted to have the arms out one holding a stopwatch and the other holding a clipboard.
After locking down the pose, we proceeded to prep the actual model for printing. This required us to connect all the parts of the model together to make it one whole piece. This was probably the most tedious part of the whole process. The head/neck, shirt, arms, pants, ankles and shins, and shoes all needed to be connected to each other to make one piece for printing.
Next after combining all the parts was we added a base and optimized the stopwatch and clip board for printing. The model however would still need some more tweaking once we tried to get it printed. We also tried to use the sculpting tools in Cinema 4D to add some extra detail in the model. They looked great but when prepping the model those parts did not hold up well in the printing system checks so we removed those details.
At this point we had a good model that we could do a quick rendering of to show what we had been working on for the past couple weeks. We also were ready to start uploading it and seeing what we would get back as far as printing quality and integrity. My first thought was to use Shapeways since they have printing for 6 days if the model print size is under 200mm(20cm/7.87”). Although our originally goal was for print size to be between 9”(22.86cm)-12”(30.48cm) high figure, my producer said that the size limit would be fine if it would come in on time. However the estimated ETA for arrival was longer then expected so we could not use them.
I started to look for alternatives that would allow us to make our deadline. I found a number of sites online and most where priced around the same as Shapeways. The top two that I found that where the closest was i.materialise.com and sculpteo.com. Both had pricing similar to Shapeways for the size we wanted to print, but Sculpteo had more tools for fixing and reviewing our model using their system that made it the front runner of the two.
Between the two of them I uploaded over 40 different model versions tweaking the geometry to attempt to fix any issues that may arise during the printing process. I had an especially hard time with the thickness of many parts of the model that did not meet the minimum required thickness. The collar and thin parts on the stopwatch and clipboard where always giving me issues. Luckily with the print being rather larger most of the small parts would be larger enough just because of the print size otherwise I would had to figure out some other solution.
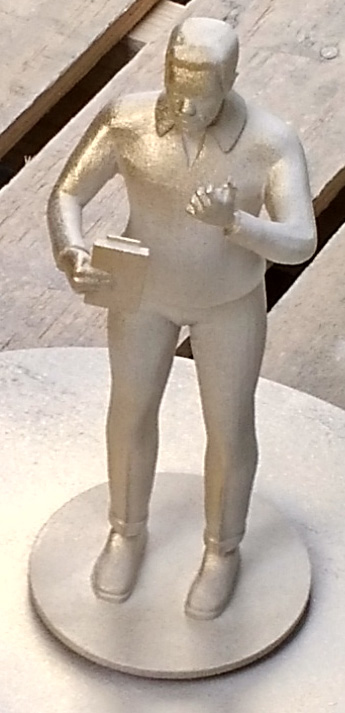
While working with these online solutions I was also still searching for a local printer in NYC to use as well since I thought that would be a good option and being local would help with delivery time. I was able to find a 3D printing place local to NYC and we were able to get in contact with them to discuss the project and had them print out an 8” figure of our model. There was one caveat though, and that was they did not have their ABS printer working at the time so we had to use their Sandstone 3D Printer. Which is not the worse option and has the ability to print in color, but is more fragile then ABS or PLA plastic material.
We went with this local printer for the company model, however as a back up I had two other models commissioned for printing via the website 3dhubs.com. This site lets you connect with 3D printer owners directly to have them print your 3D model for a fee. You can easily upload your model have it system checked for printing and priced out. Then you can search for a printer locally and either pick it up or have it shipped to you. An awesome idea that is just starting out but seems like it will have future with the growth of 3D printers.
I choose three printers local to New York City and sent them a preliminary request about my deadline and a preview image of my print. I received responses from two and choose to have a print made with both of them. One of them unfortunately had an issue with their printer, so mid print their printer broke down with some technical problems so I could not get a print from them. I did however get a clean print from my other hub, which was Peerless’s Hub. If you want read my experience working with this hub check out my review on his hub, but to sum it up I had a great experience working with them. I also used a different material for the print as well, using Makerjuice G+, which I had never used before but is similar to PLA.
Now began the waiting process as the prints where completed. This was one of the more nerve racking parts during the project since it was all in the hands of the printers and we had to trust that they would produce our model in the time we needed it. I was kept update with my prints fairly regularly from the 3D hubs printer and knew of any issues that cam up during the printing process. From the NYC local printer not so much but both arrived in time for when we needed them to.
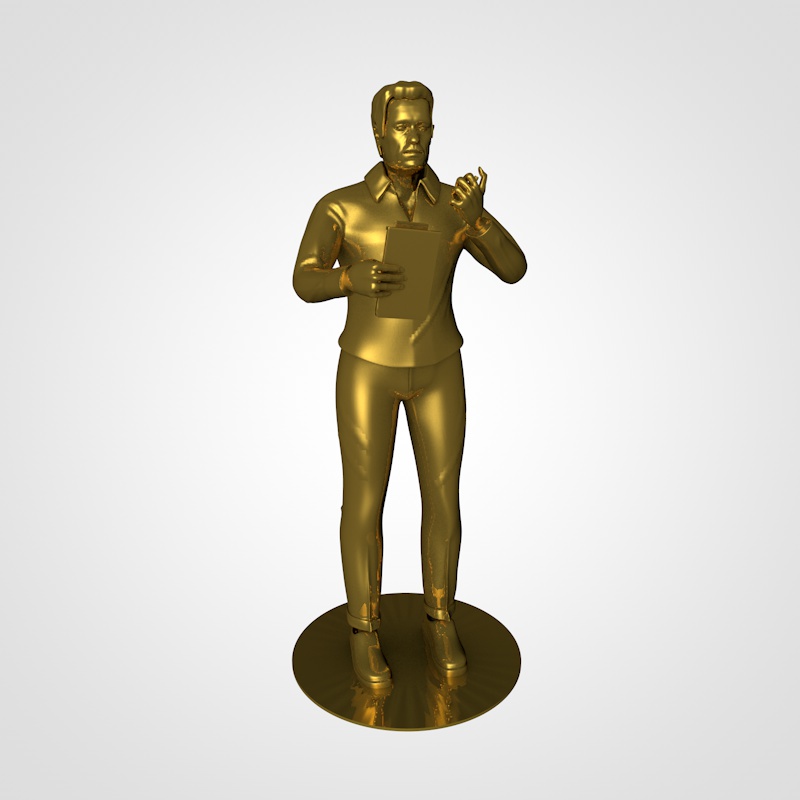
Through out the whole process we had been discussing at the same time how we would would actually paint our model to make it resemble an actual gold trophy. I did a lot of research on how to paint on 3D printed plastic as well as other figures. I also did some searching on what would be the best type of gold spray paint to use to get the best looking gold items as well. The video links were especially good to actually see how the paint looked when applied to an objects. They also helped me determine the final paint that I would get which was Rust-Oleum 1910830 Metallic Spray Gold & Rust-Oleum 7710830 Bright Coat Metallic Color Spray Gold both 11-Ounces. The first one I used on the backup and the second on the sandstone model.
All of this researching was good but it didn’t nearly help as much as asking someone who had years of experience actually doing production work. This is when I asked around the graphic artists at work if they knew about spray painting. Neil, who is a newer addition to our group at work, had years of experience working in production and graciously lent his expertise to our project. Using him as a resource I was able to determine not only some more material I would need to buy but also some techniques for painting. He pretty much did most of the priming, painting, and lacquering of the company model that was eventually used in the show.
The process was for making the models look like gold was fairly straight forward. On my backup model I did not use the primer and simply applied the gold paint directly to the model doing 2.5 coats. I would have done a full 3 but I ran out of paint due to my earlier tests I did. These test lead me to believe that I could paint directly on the model without primer.
That was not the case with the work version that was sandstone. After testing it we decided that the sandstone was to porous and would required a few coats primer before applying the gold. We also where concerned that to much of the grain from the sandstone would show through the paint. It does show as you can see but it does add a nice feel to it that wound up looking nice for our purposes. I still like my version of the model a bit better since it has the nice clean shiny look of an actual trophy.
The last step we had to do was to apply the models to our base which was a plastic mirror riser that I found on amazon. We went through a few options to find one that we thought work well since we decided not to go the traditional route with a wood or marble-esqe base that is normally used. We applied it to the base using some 5min epoxy that I brought from home.
The next day they used the model on the show and even did a close up on it which made me cringe just a bit. Overall though it worked well as a prop on the set and looked pretty official looking despite being built in just few weeks. I wasn’t scheduled to work when the show was recorded by my producer was kind enough to give me a DVD copy of the show. We also did some other graphics that feature the trophy throughout the show as well.
My last thoughts about the whole process are about how cool it was to do a different type of project then what we normally work on. It was quite an experience working on making physical object as it did the previous times I have. It definitely makes you think about your modeling process differently especially in regards to how scale is so important. And as always I wish we had more time, particularly working on the design of the model. We got a few comments on his pants legs, looking like high waters a bit, and on the shape of his hips. Both could be fixed if we had the time to review the model a bit longer before trying to get it printed but we had to make our deadline.
It was a great project to work on and I’m glad we got the chance to work on is despite the concerns of our manager saying the project would take too much extra time(which it did) to complete it.
Lessons Learned
Take more time making your model as good as you can before print prepping
Be prepared to do some more iterative tweaks to get your model ready for printing
Research your 3D printer thoroughly and choose wisely, especially if you have a deadline to make
Have a solid location for the painting process and letting it dry in a ventilated area.
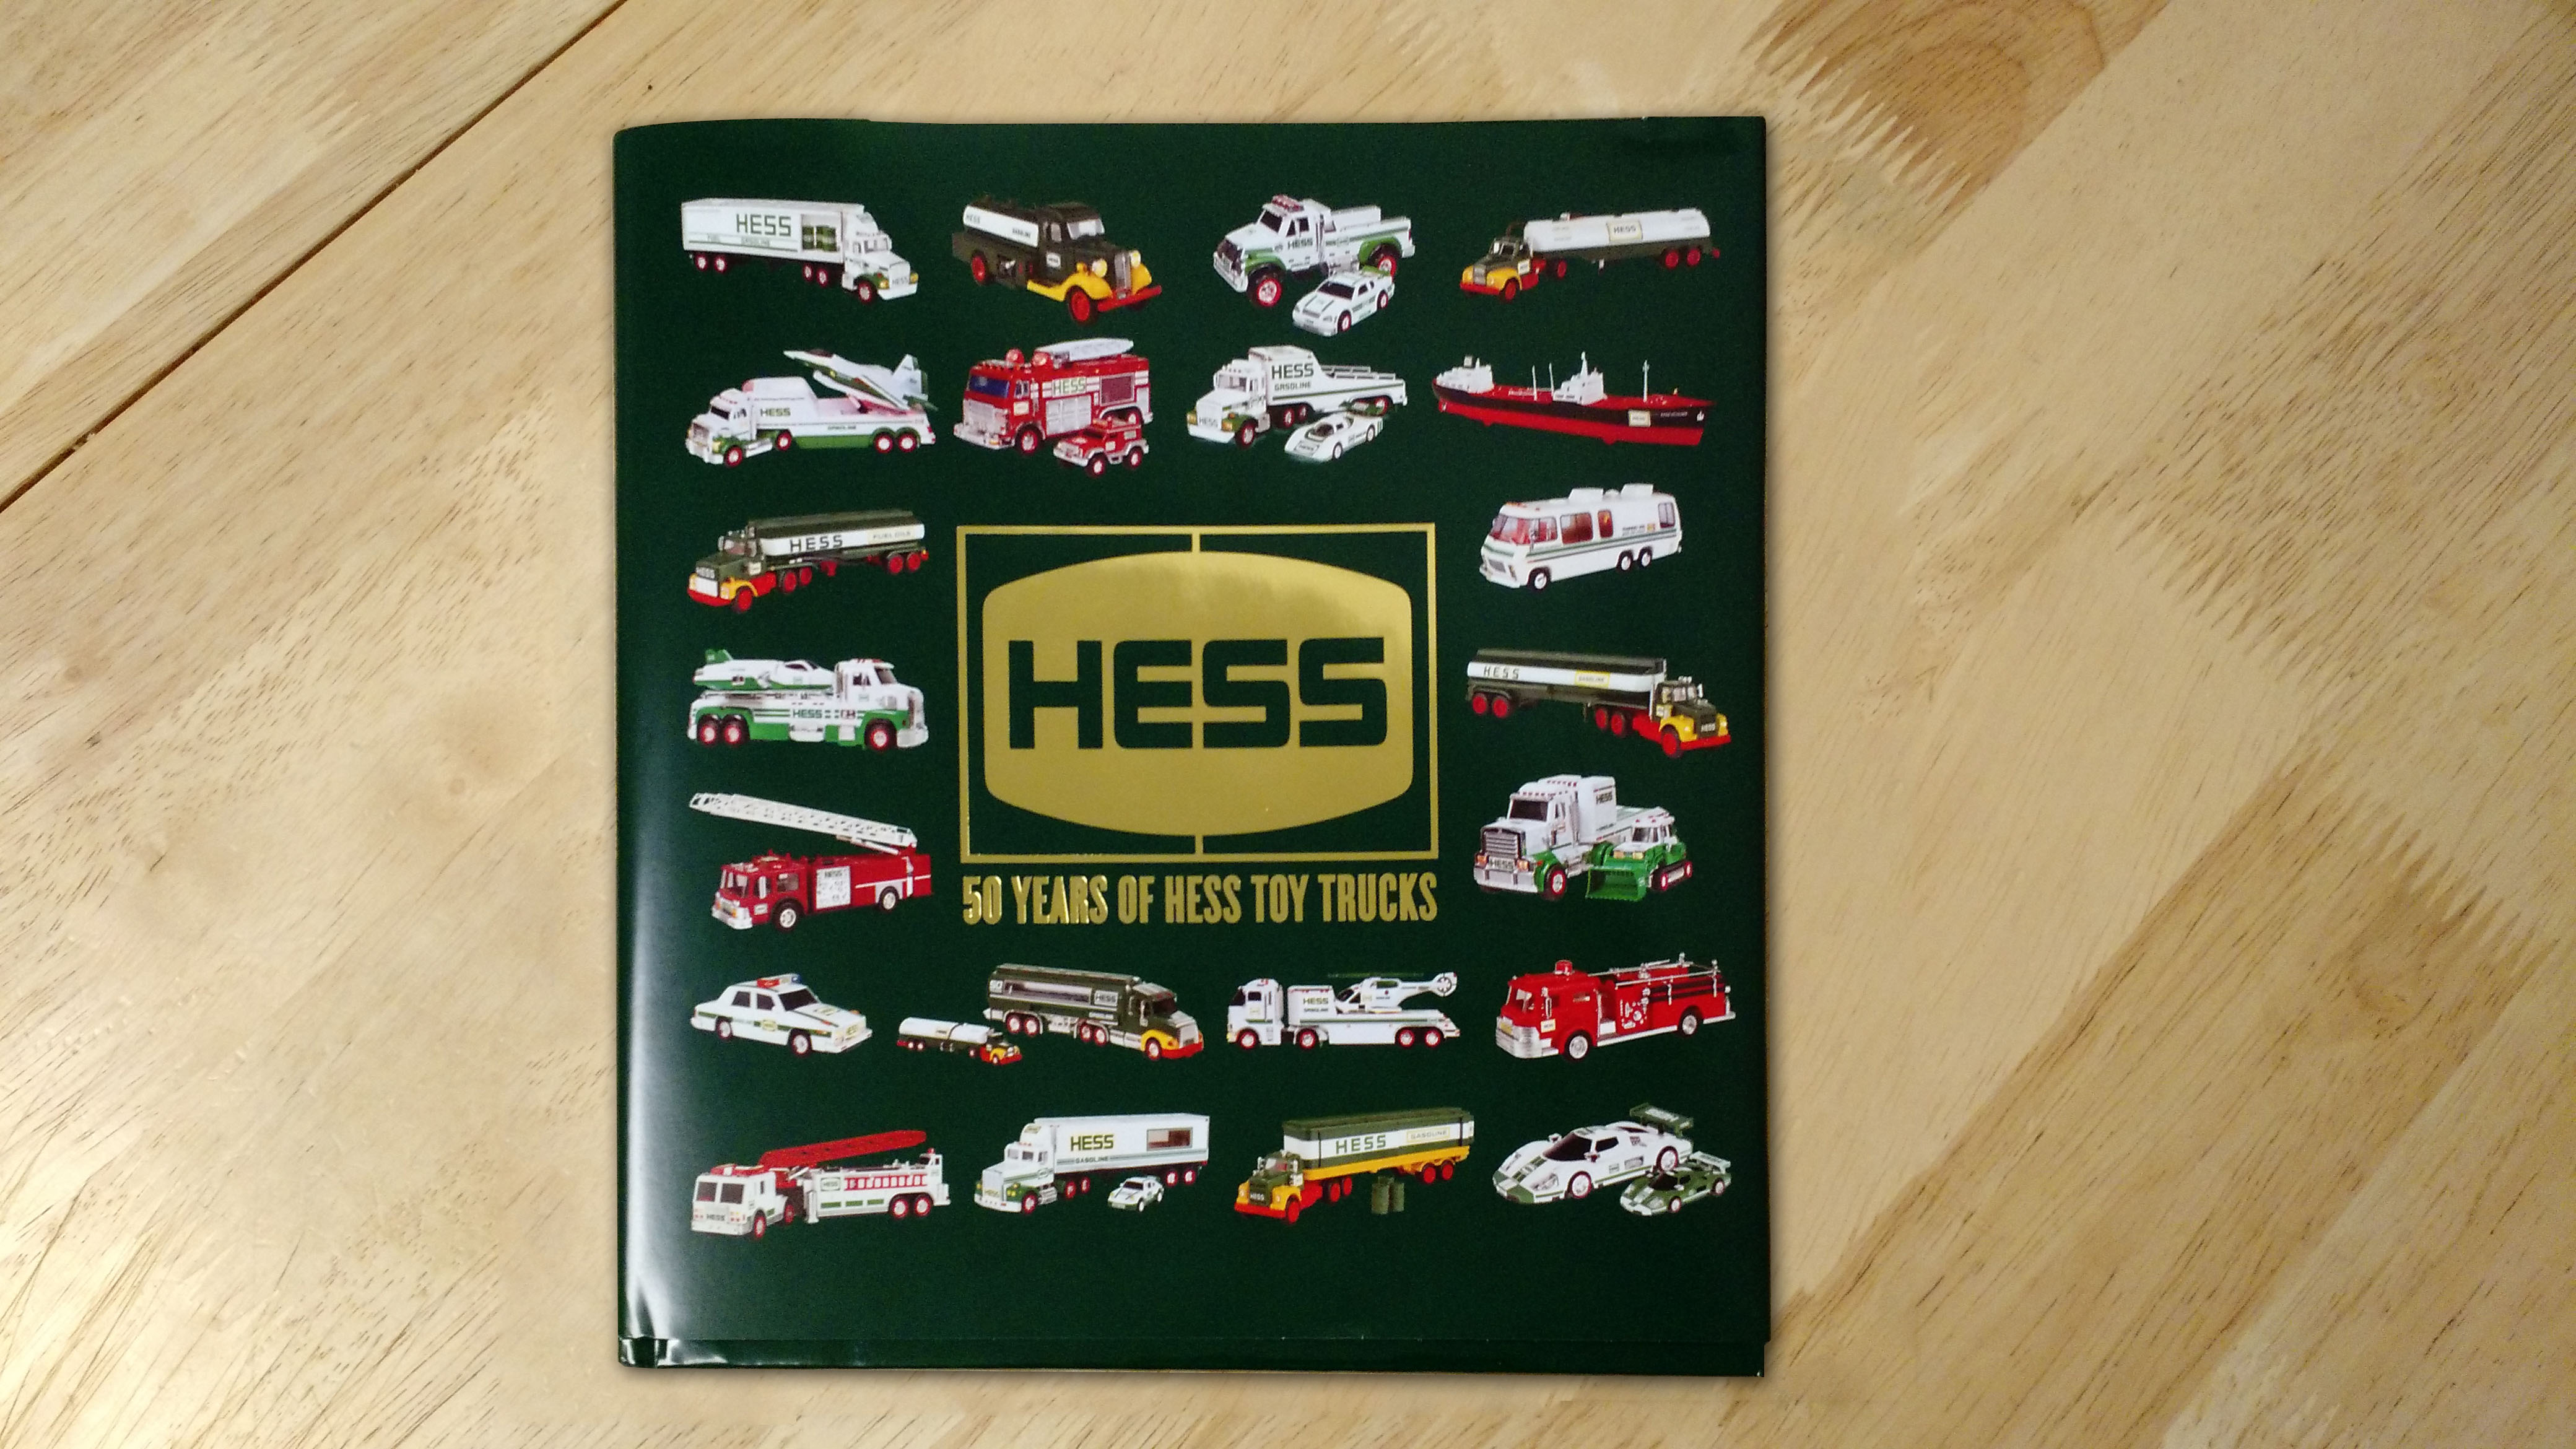
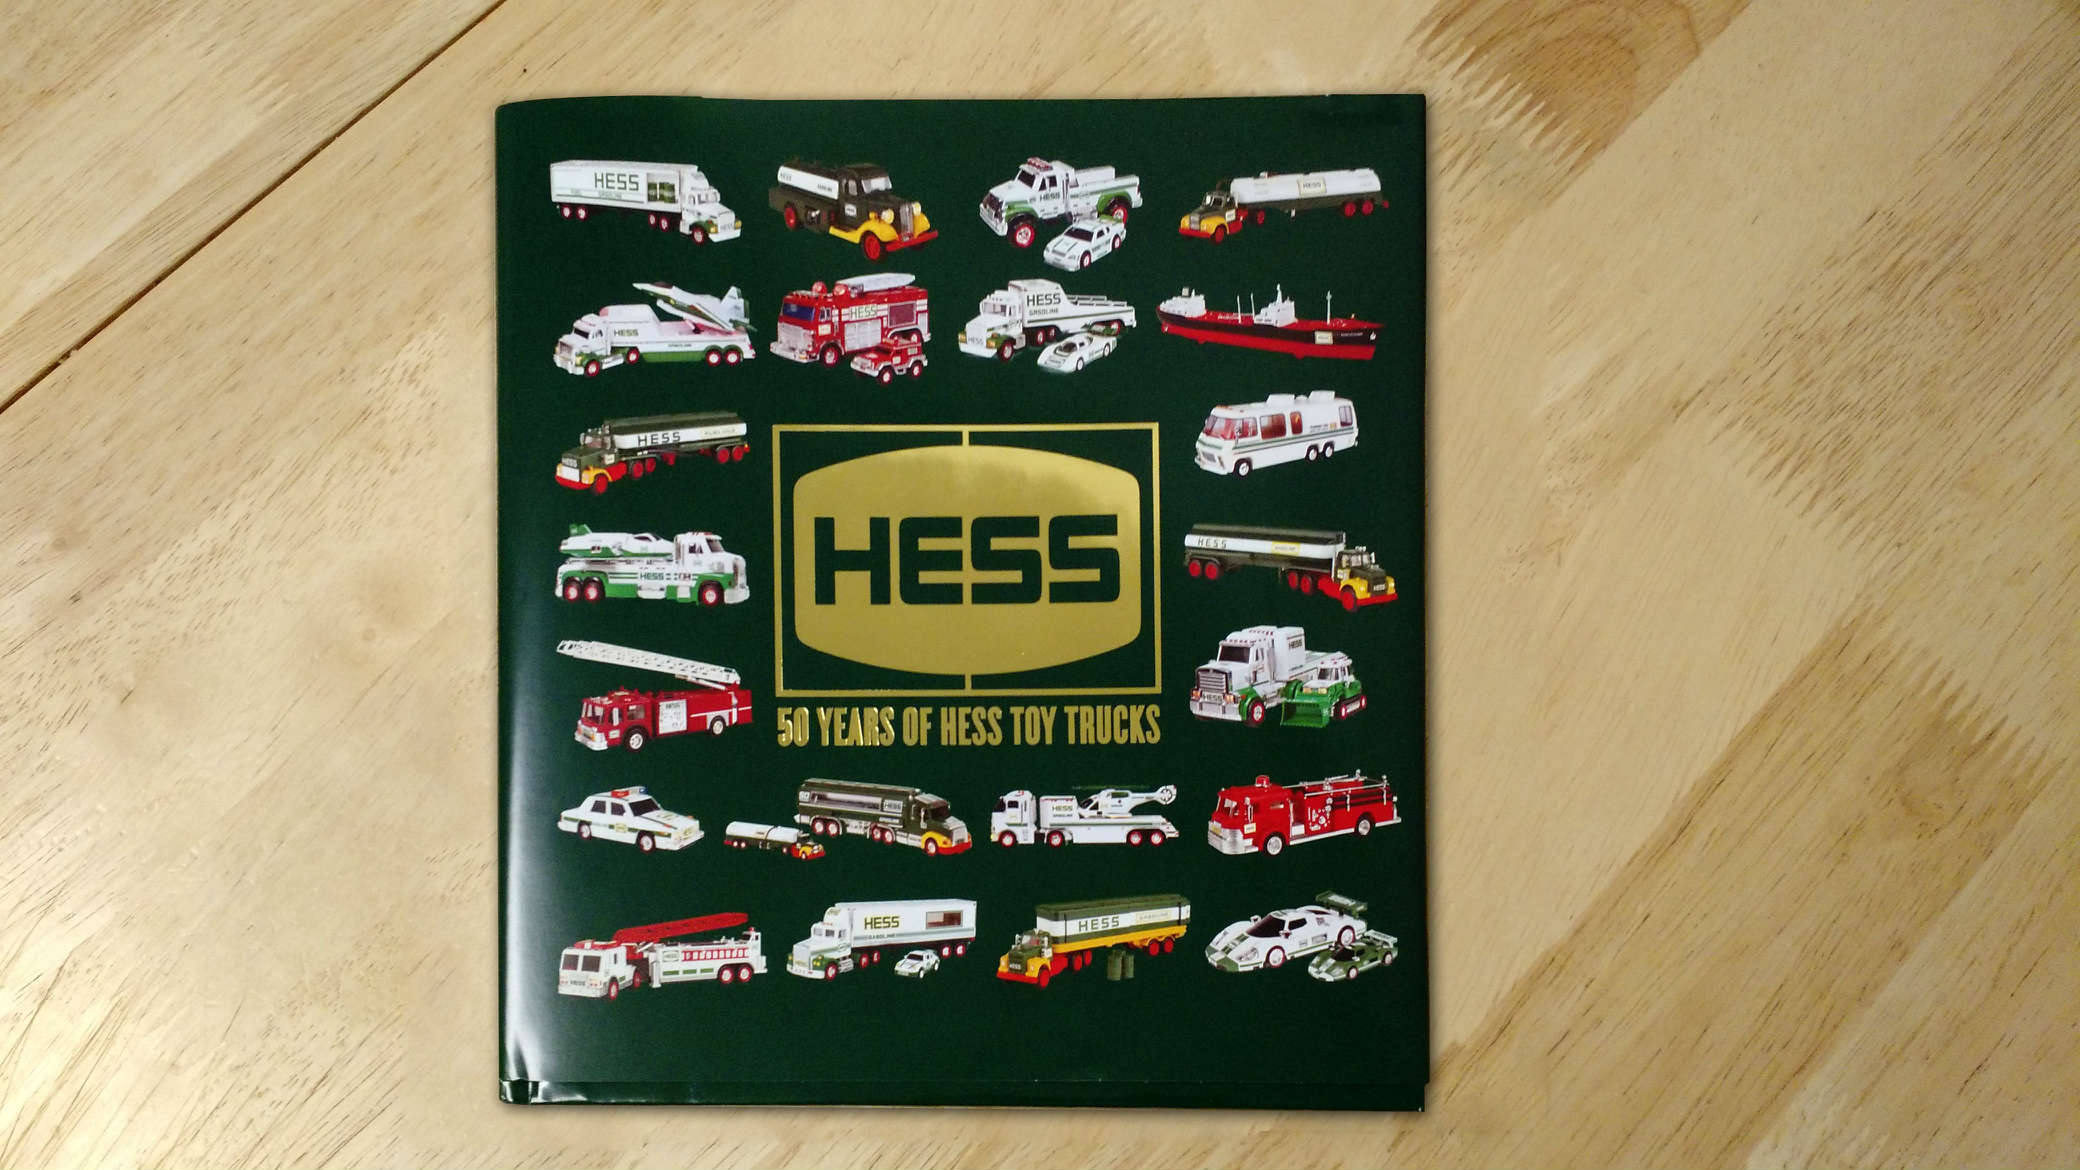
I got the idea to start another personal project around the end of November, revolving around my Hess Trucks that I’ve been given over the years. Part of the idea came from my Dad who mentioned that he should put them all together to take a picture of all of them . I decided to take it a step further and do a series of individual pictures/videos that would end when I get the newest one for this year.
I have received them from my grandfather since 1990 when I was around two years old. Then my mother would get them when my grandfather couldn’t get them anymore. So I have almost everyone since then except 2008 where we(Mom) waited to long and we didn’t get it. Somehow I was able to get the small front loader truck that came with the Hess truck for that year, though I don’t remember how I acquired it.
Pre-planning
To start this project up I first developed a template that I would use to display each truck on my Instagram, which I had recently joined after the recommendation of my co-workers. I looked around to see if anyone had done something similar or used any video production tools with Instagram. There wasn’t much out there but I did find a good video on doing Instagram videos with After Effects where I learned the video size limit and some exporting specs. The exporting specs didn’t work perfectly for my version(s) of After Effects. I wasn’t getting any sound in the beginning, but rendering with Media Encoder I was able to find an easy way to get my videos in a usable format.
After some research I completed my design in Photoshop after one revision and some feedback from some friends. I then brought it in to After Effects to set up the animations and use some quick temp images of my Truck to test the layout and animation. I also did some test renders to see how my videos would work in Instagram sharing the videos privately to make sure it would actually work.
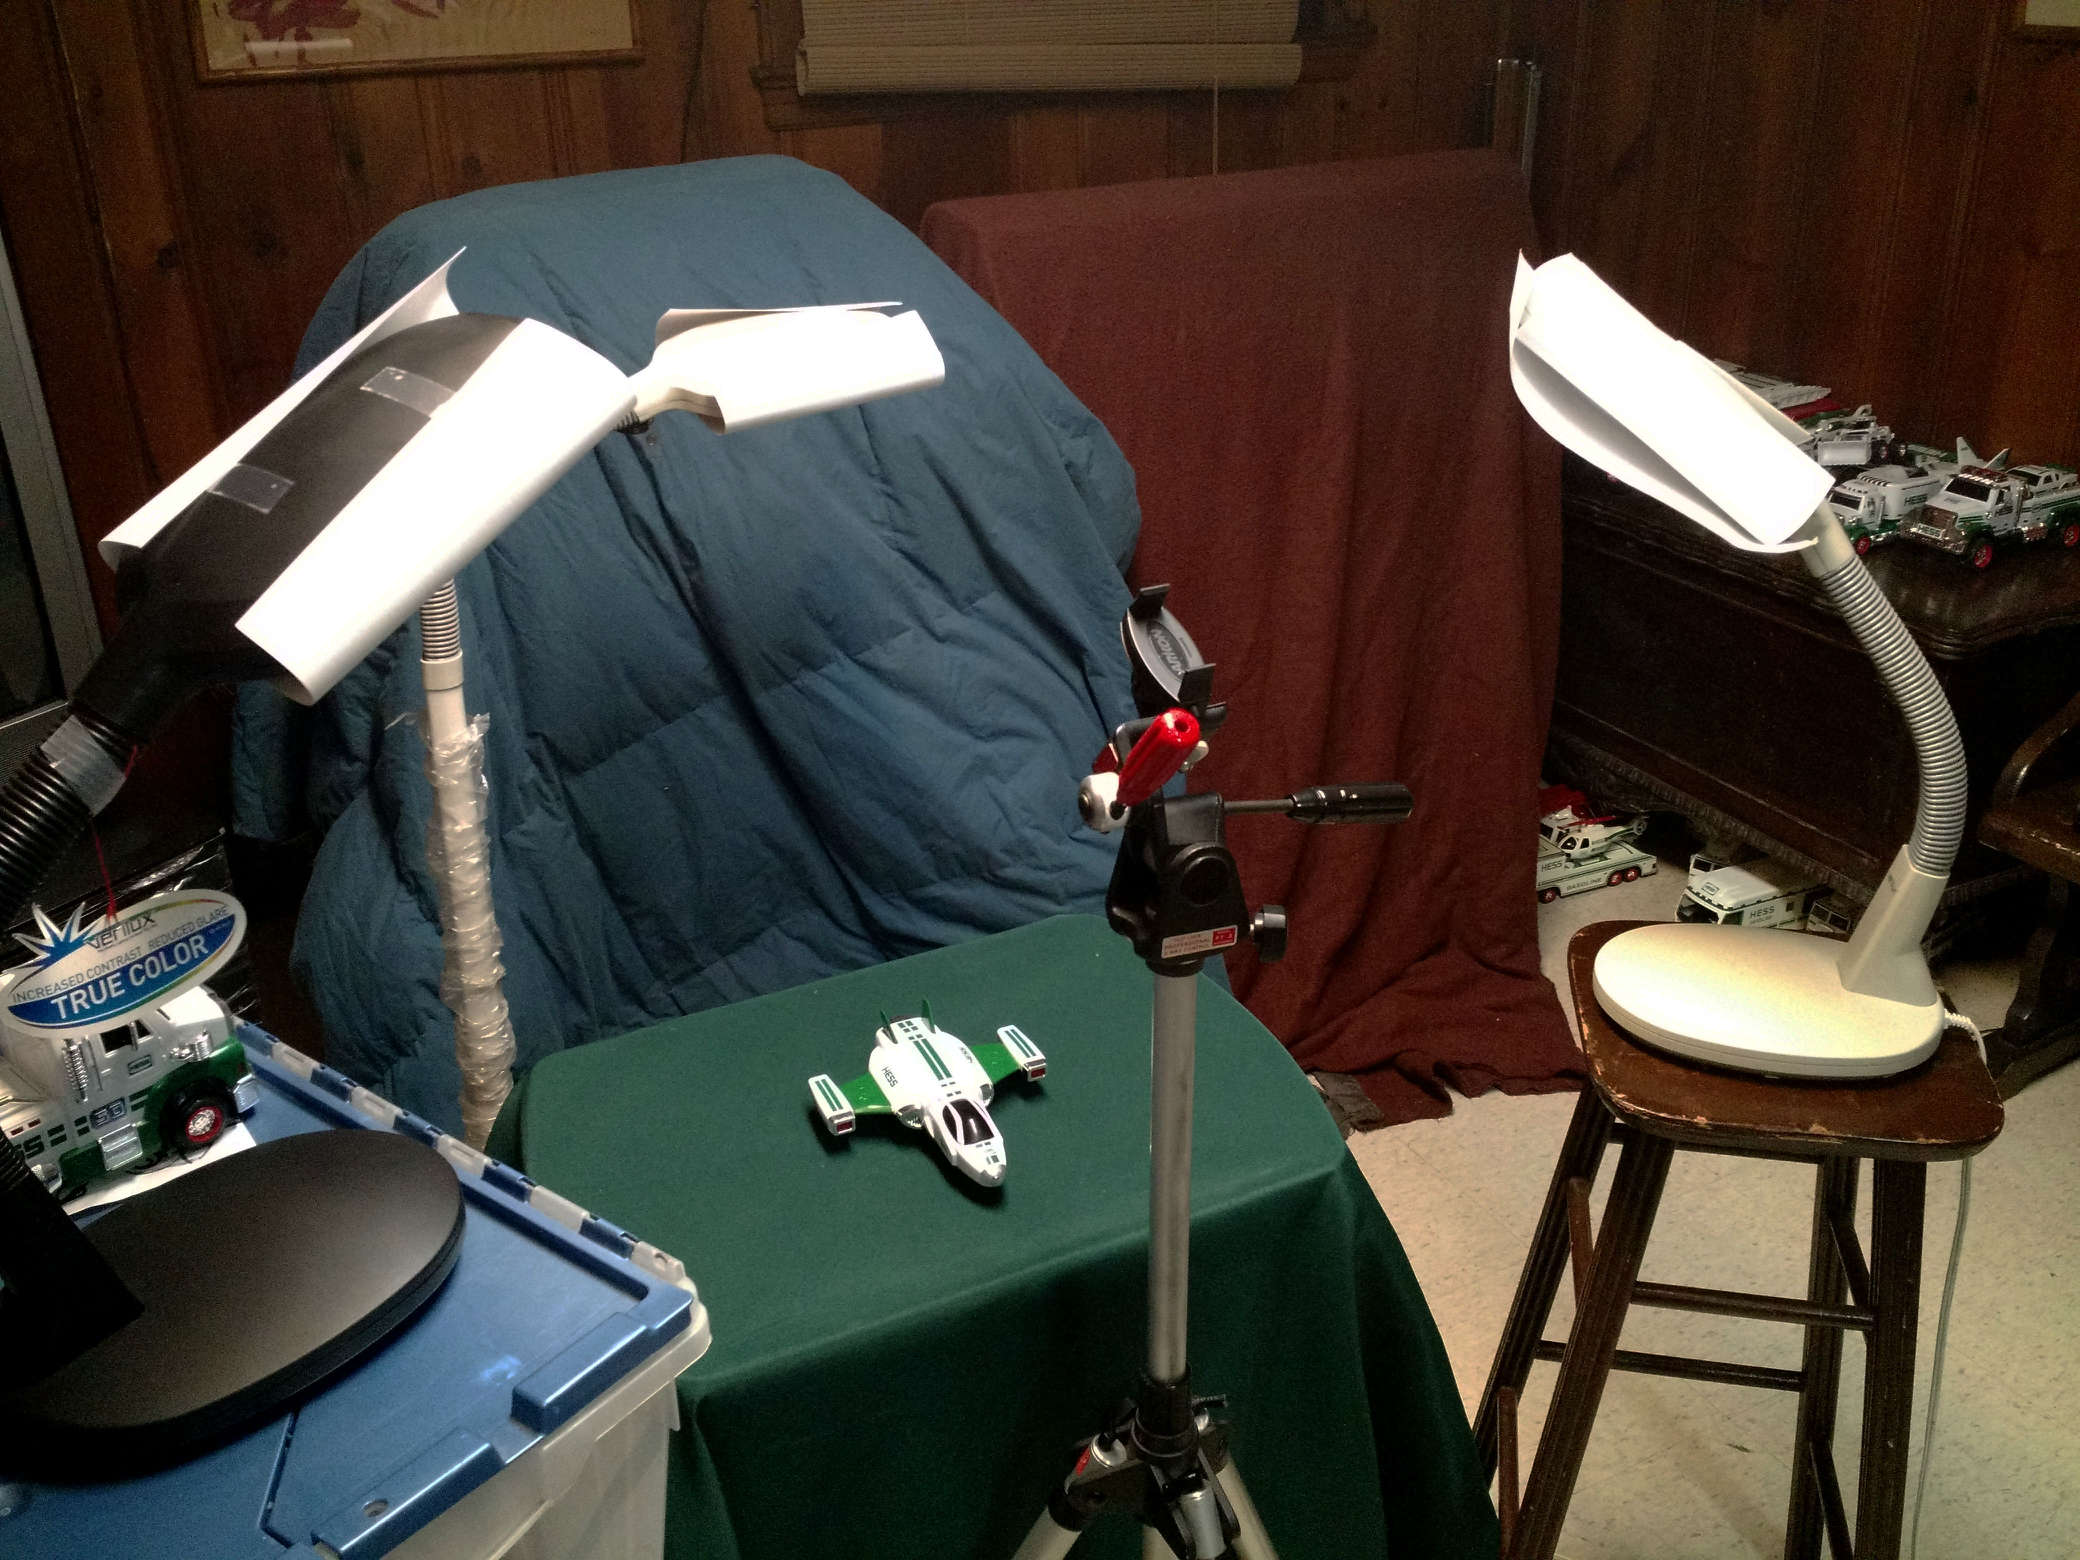
While working on the design and animation I was also developing my set that I would be using to take these pictures. My original idea was to make my set as simple as possible so that I could quickly take make photos without having to adjust much. The location was my basement where I could set it up easily leave it up with out it interfering with anything. The stage was just a few crates stacked on top of each other with a green table-cloth draped over it to make it seem nice.
The lighting was originally going to be just the ceiling light, which are the long fluorescent bulbs, that I was going to cover to diffuse the light. This did not work at all, too bright even with reams of paper covering diffusion and too noisy when doing video, just really bad overall. A co-worker suggested getting some cheap LED lights which sounded good though I thought maybe that might be a bit much for this simple(seemingly) personal project
What I wound up using where four Verilux lights that I had/commandeered to use. They boast being “original natural spectrum® floor lamp”, and the natural lighting did worked well for me. Along with some extra paper covering they worked out well for still photographs and where passable for the type of video I was going for. They do have a two way switch on them to control the light level but the difference was barely perceptible to the eye…
The last part I needed for the project was camera and tripod. Unfortunately I no longer had possession of my pretty good Canon point and shoot(yeah I know…) camera but I did have a new Moto X 2nd Gen. Cell phone. So along with my current tripod and a smartphone tripod holder I ordered from Amazon I was set to take my pictures.
Photo Production
The actual production process for making these Instagram videos evolved over time and varies a bit depending on which truck I was photographing but the basic outlined stayed the same. I set the truck up on my stage and would take pictures from various angles around the whole truck. I would usually start from a high angle to make sure I could get all of the truck on the stage. Then I would turn it around taking pictures and then do the same at a lower angle to get closer to the truck. The low angle worked well for getting the license plate years and the smaller trucks, motorcycles, buggies and other smaller vehicles that came inside the bigger trucks. I would repeat the same process for taking pictures with the lights off for the Trucks that worked well in the dark.
While taking these photos I learned a few things about light, composition, and mechanics of phone camera as well. There was never a perfect light setup(not too surprising) even when just rotating the same Truck around to take a picture from a different sides. I always had to move at least one light to compensate for something. My goal was to have the shadows as minimal as possible but somewhere along the way I let that goal go to just try to get good reflections and as even lighting as possible. This was not always achieved and even with the exposure control on my camera some Trucks where still blown out. This was really hard with video since the my camera phone requires a lot of light to get the truck in focus, so almost all the video footage was over exposed. Fixing it in post helped a bit but I could only do so much.
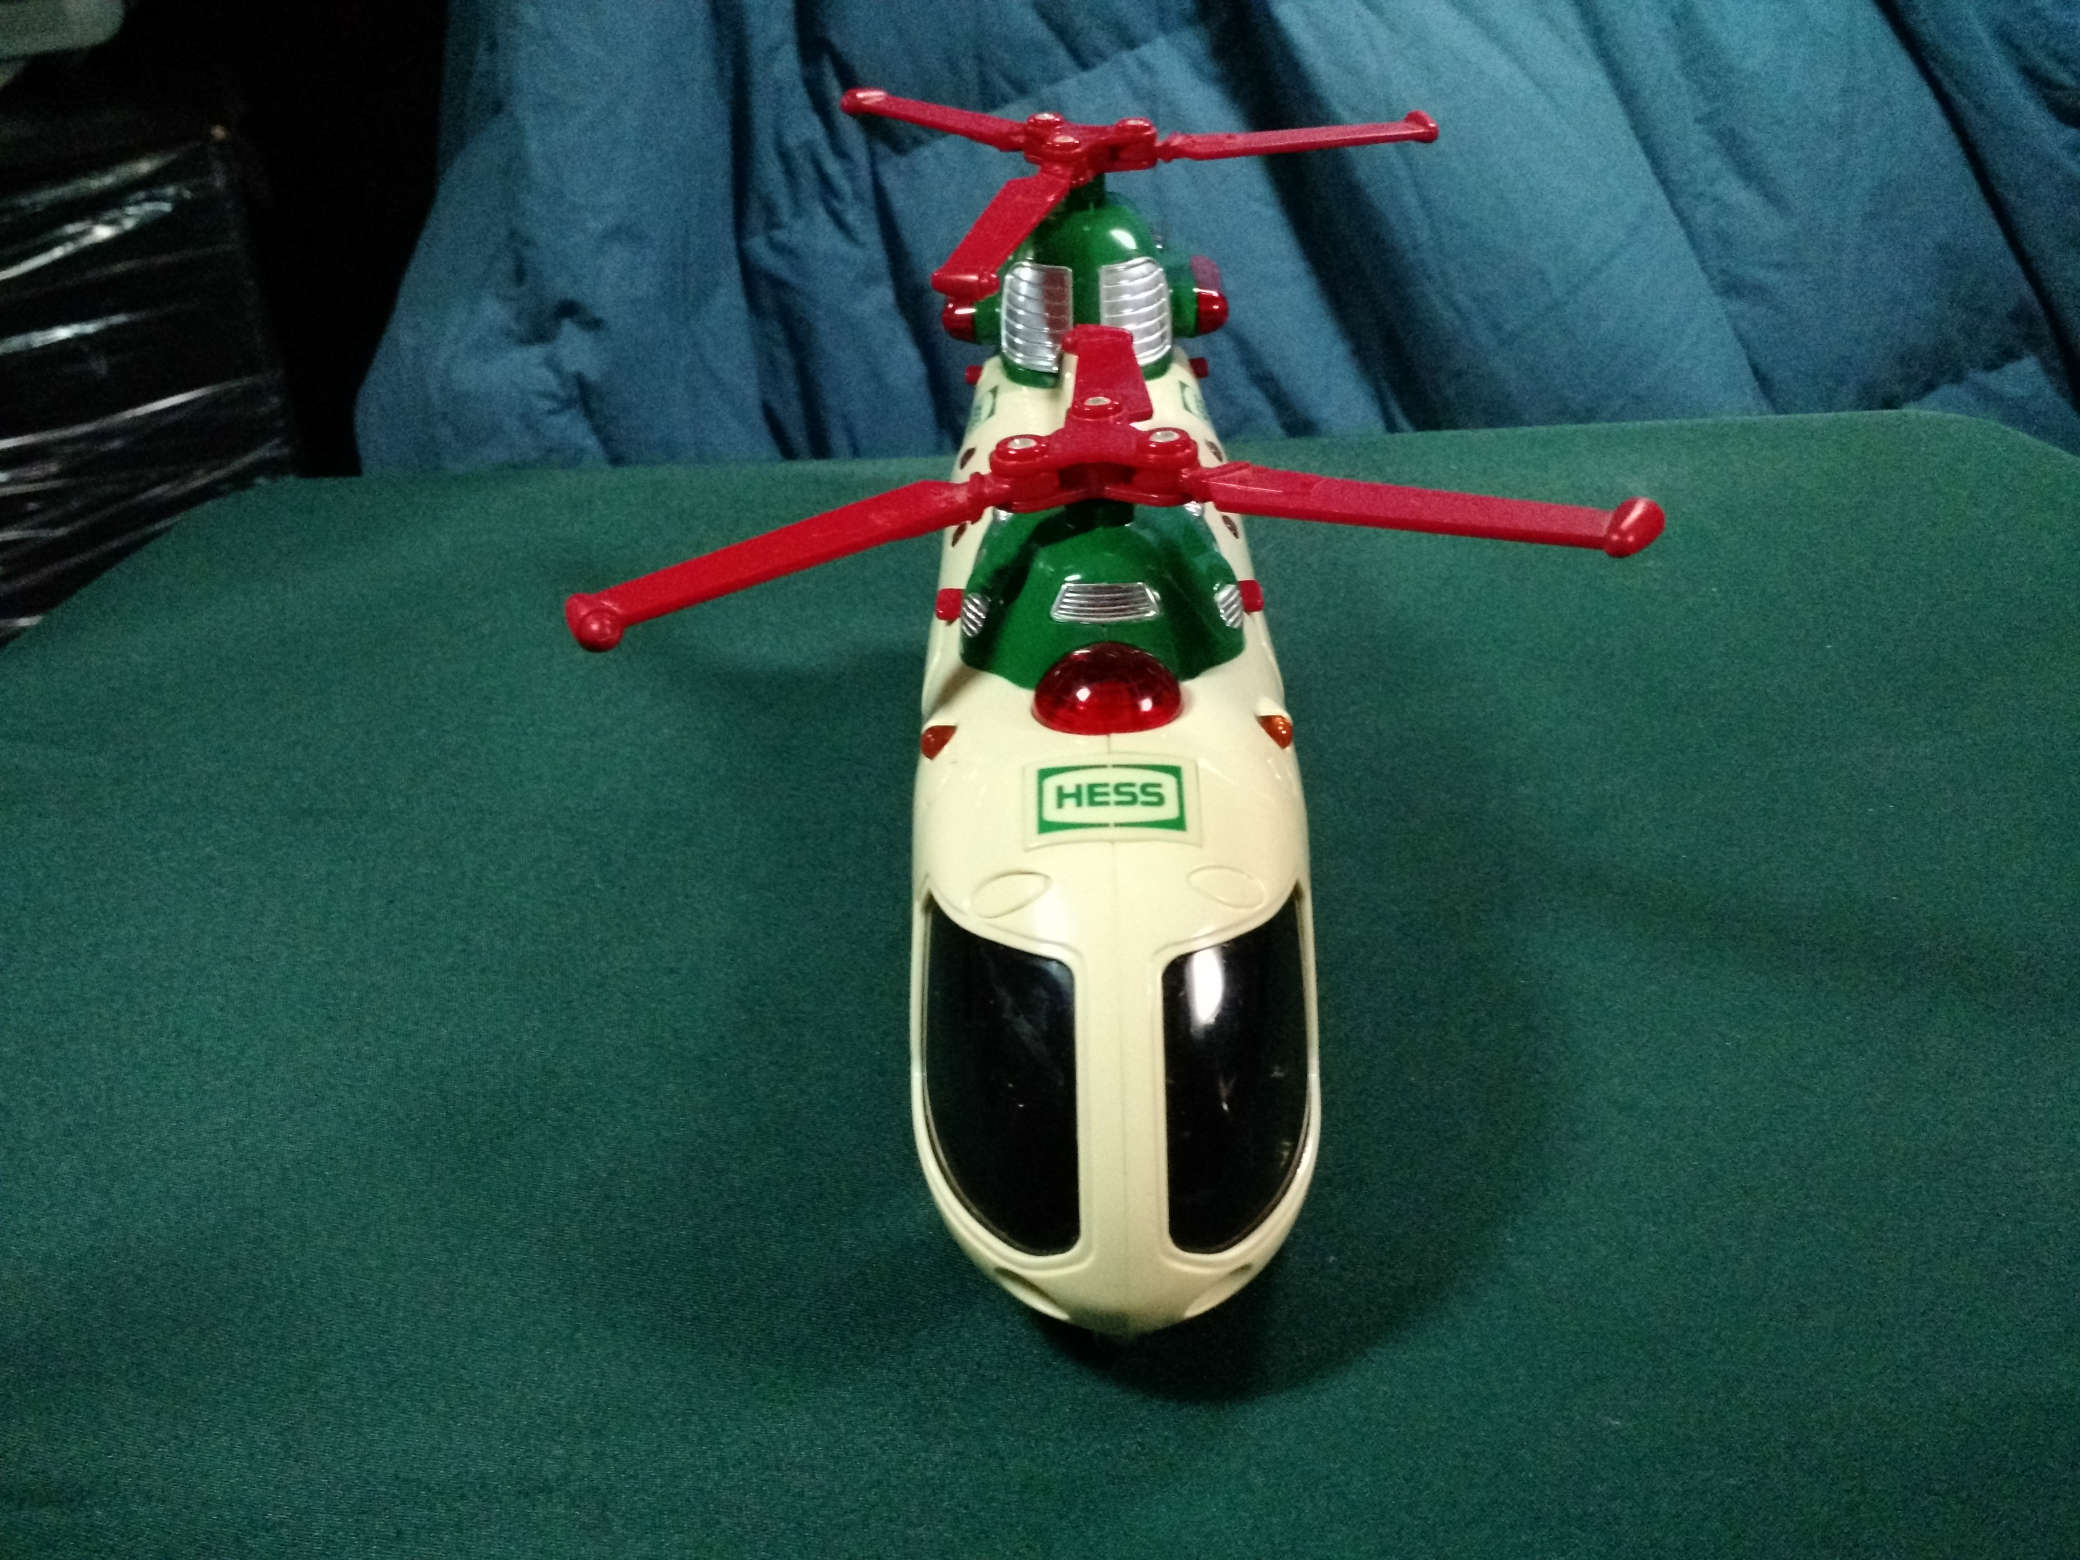
Composing the pictures was for the most part straight forward, once I had done a few trucks. However not all of them where the same shape and many where not trucks at all. I have said “trucks” this whole time since that is how they are marketed but many of the ones I have are over sized helicopters, cars, or have a space vehicle on their trailer. The Helicopters where particularly hard since I wanted to get the blades all in frame and stay completely on my stage. This was where I wished I had a bigger set for some extra wiggle room for framing that would have been helpful for the larger trucks as well. I was able to work around it with mainly just using photos that were zoomed in or some post work to extend the stage.
Instagram Video Production
Producing the video was pretty simple but it took time to go through all the photos I took. I had around 150-200 pictures for each truck that I had to go through. I started out going through the photos I wanted to use ahead of time and separating them out before I hand. However by the time I got to the late 2000’s I was doing some of the videos the day I shared them, so I would find the picture I wanted to use from my main folder separate them and import them for use all in one go. But by then I knew what pictures I was probably going to use for each slide section anyway.
Each still picture frame went through four different pictures, so eight in total. The ending two usually being the year license plate and some times with the in the dark photo. The top large frame was designed for videos or still pictures depending on the truck, ideally I wanted to make a video featuring the major electronic feature of that truck. So all of them have lights(not all working), many have sounds, and some have motorized parts. I edited together the various sounds that each made to have them go off during the video. I was able to feature all the sounds of each truck until the latest years where they had too many sounds to fit together in a coherent way.
Some of the sounds also worked in tandem with how you would move some of the trucks, car or shuttle/plane. One racer car even had its own sound, so I was able to have it run across the stage and use its sound effects. I did this also with jets/shuttle although they didn’t actually fly across the set so I had to animate them in After Effects and add their sound effects. I think the newest one, 2014, worked out well since I was able to composite the cruiser taking off the launch pad and have the scout ship follow it.
Sharing and Recap
Getting it out there was just a simple as transferring the final video for each truck on my phone and telling Instagram to upload the video. I wrote out little blurbs about each one to accompany the video ahead of time, then shared it to via Instagram to my Facebook, Twitter, and Tumblr. I had planned a schedule so I knew which year to post on what day so that I didn’t have to post more then two a day.
During the posting process one thing I think I did too much of was hash tags. I had them already setup in a text document and just threw them on at the end. I think it would have been better to integrate them more into my description of each truck and not have as many.
In the end it was a fun and self-educating project to put together. It was also a lot more work then I was expecting but still rewarding. Not sure if I will do it again next year but if I do I will definitely start earlier.
This past weekend I was able to attend the Make Faire on Saturday in Queens, NYC. I had heard of this from the NYC Drone User Group email newsletter and the build-In I went to but didn’t really think to much of it in terms of attending. Then I found out that Flitetest would be attending and that got me a bit more interested in attending but I was still on the fence most of the week before and didn’t get my ticket till the day before.
So on Saturday I made the trek out there from NJ to experience the Maker Faire which really was the greatest show and tell. There was so much going on it was kind of hard to focus on anyone thing specifically. I should have used my experience from going to NYCC to really plan out what I wanted to do ahead of time. I did have two main things do plus what I marked as some fav’s in the maker faire app, but when I got there I didn’t look at the app at all.
The top thing on my list to was to visit the FliteTest Tent and talk to those guys. It was really cool being able to talk to all of them after watching all of their videos on youtube. I had the chance to talk to all of them for a bit including their production/camera man and talk a bit about the production of the show too which was really cool. I took a few pictures of their tent and some of the planes and multi-rotors they brought with them. My favorite from the show that they brought was the toaster plane.
FliteTtest didn’t get to fly much that I saw at this event since for the most part it was not allowed but Peter did get a chance to fly his VTOL in the Game of Drone Cage for a bit with some other multi-rotors. Check out the footage I recorded. I also have some footage of two drone battles that I may add-on my YouTube channel.
The second thing that I had in mind for the trip was to see the DroneKraft presentation and their racing quad that they where showing off. The overall presentation was nice but a bit boring if you had some experience in quads at all before. They did do a nice bit on explaining what their goals where and what they do with “drones” vs the military. And I think the crowd liked the videos that they showed. They also took a nice risky flight of their quad in the small area they had to present. I took a video of it you can view below.
Other than those two main things I pretty much walked around without much purpose looking at all the cool things. I took a lot of interest in there 3D printers since I’m looking to get one. There was a lot to look it, it definitely would have been cool to go back for a second day if I could, I think next year I will. Here are some other pictures I took from the event. I also posted some gifs on my tumblr.
This started as a project for work but was never finished/used in the end. So I decided to turn it into a personal project after changing a few things. The cockroach model is from turbosquid which I rigged up. I did the backbone(exoskeleton) wrong but it still works well for the amount of control I wanted. If anyone wanted the model rigged just get in touch with me and I can post it up. Thanks goes to everyone in my office who gave me great extra ideas to add to the final project.
So it seems I have gone almost more than 2 months without me posting anything to my blog. Well most of my summer has been working and flying/building my multi-rotors. Here is a picture of all four of them as of right now.
I may go to a “Build-In” near me to repair it with other hobbyist and the like. From when I started drafting this post I went to the NYCDUG Build-In. I didn’t work on fixing my quads at all but I did get to meet a bunch of cool people who are in to multi-rotors/drones and the like. Some of their rigs where pretty cool like the two big hexacopters.
I also got to control the rig for the camera on one of the guy’s hexacopter.
It was really cool being the operator of camera that is just flying the sky. I have some footage of me controlling the camera but it’s mainly just me repeating how cool it is so the pics above will have to suffice. If you look on the MeetUp page you can see the photos that I took at the build-in. I also did a quick edit of all the footage I took at the event to hopefully get across how fun it was.
Back to my quads, the one that I’m the most proud of building so far is my Tricopter since that required a bit work with the servo then all of my other quads. The build log is on the flite test forums.
It still needs a few upgrades like some better motors and ESC’s also a better tail servo wouldn’t hurt either but it flies pretty well.
It also seems to attract a bit more attention as I was flying in a park near me and two young kids and mom came up to me and asked about what I was flying. After flying it around the kids in the air, above their heads, I was able to land it and show them my tricopter and my other quads to them.
It was pretty cool being able to show them and see how interested they where in them. It might have gone over their heads a bit but who knows, like their mom said they may become the scientists or engineers who build/design them in the future.
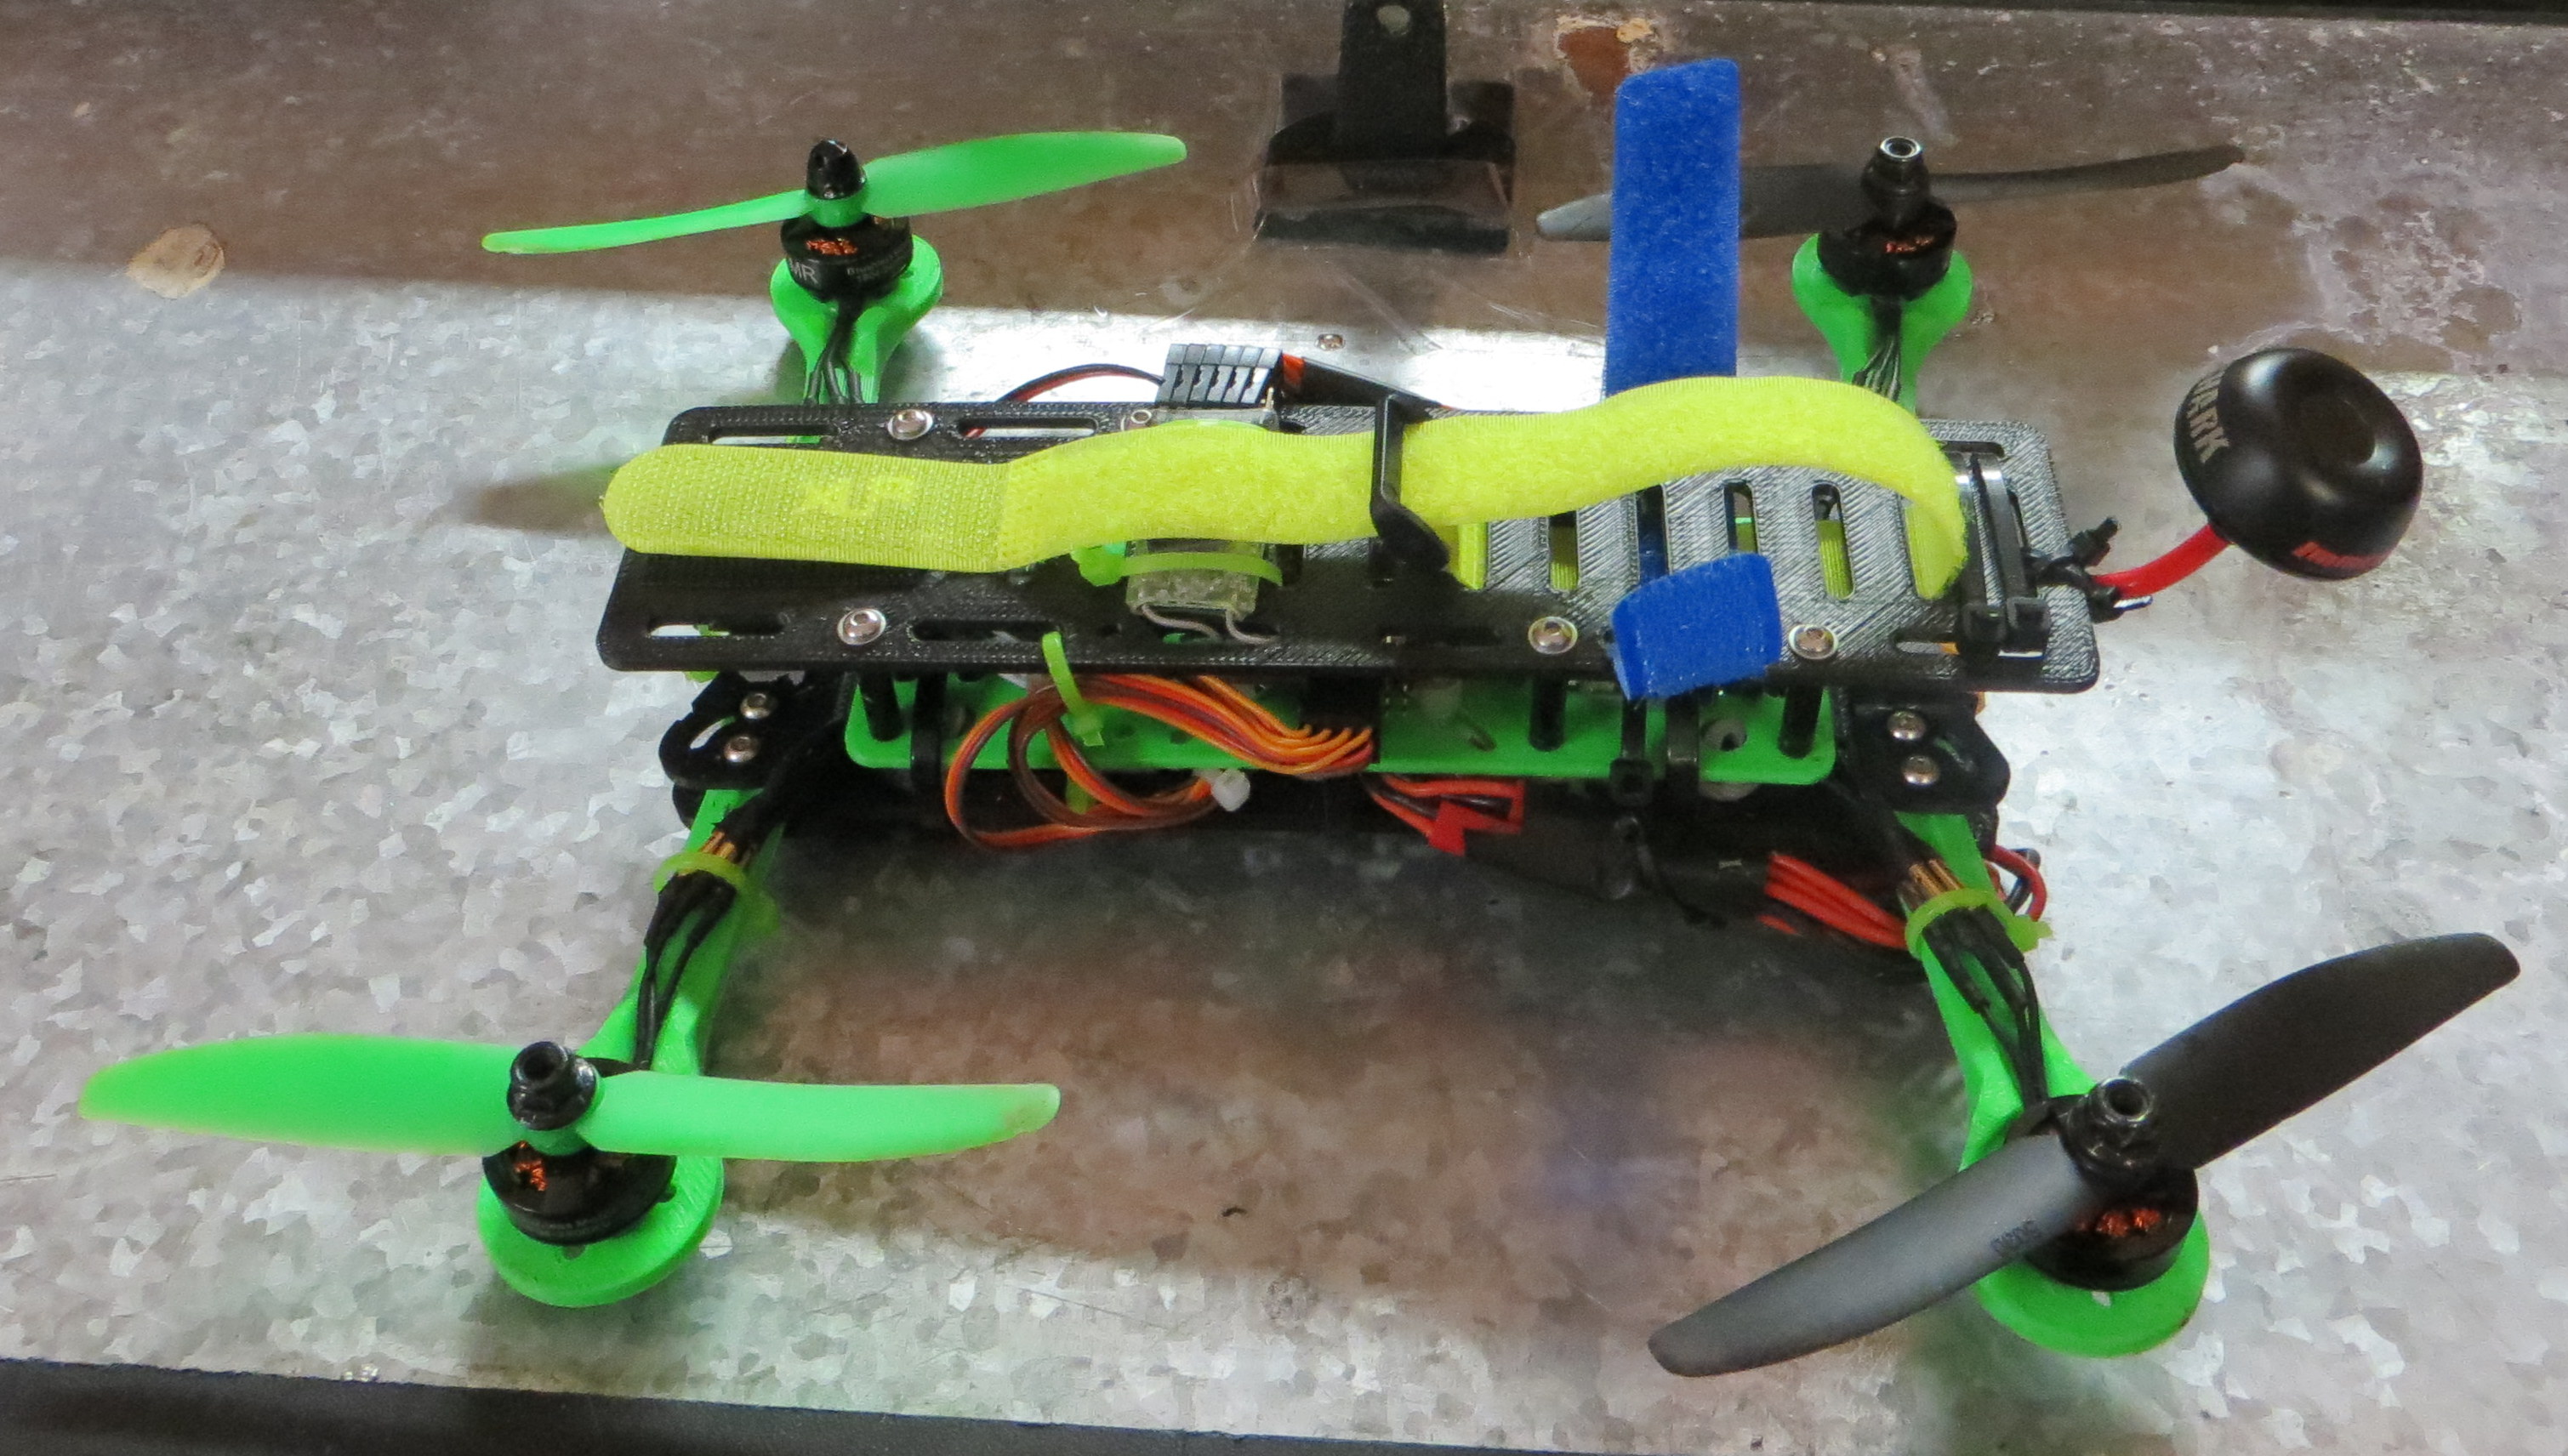
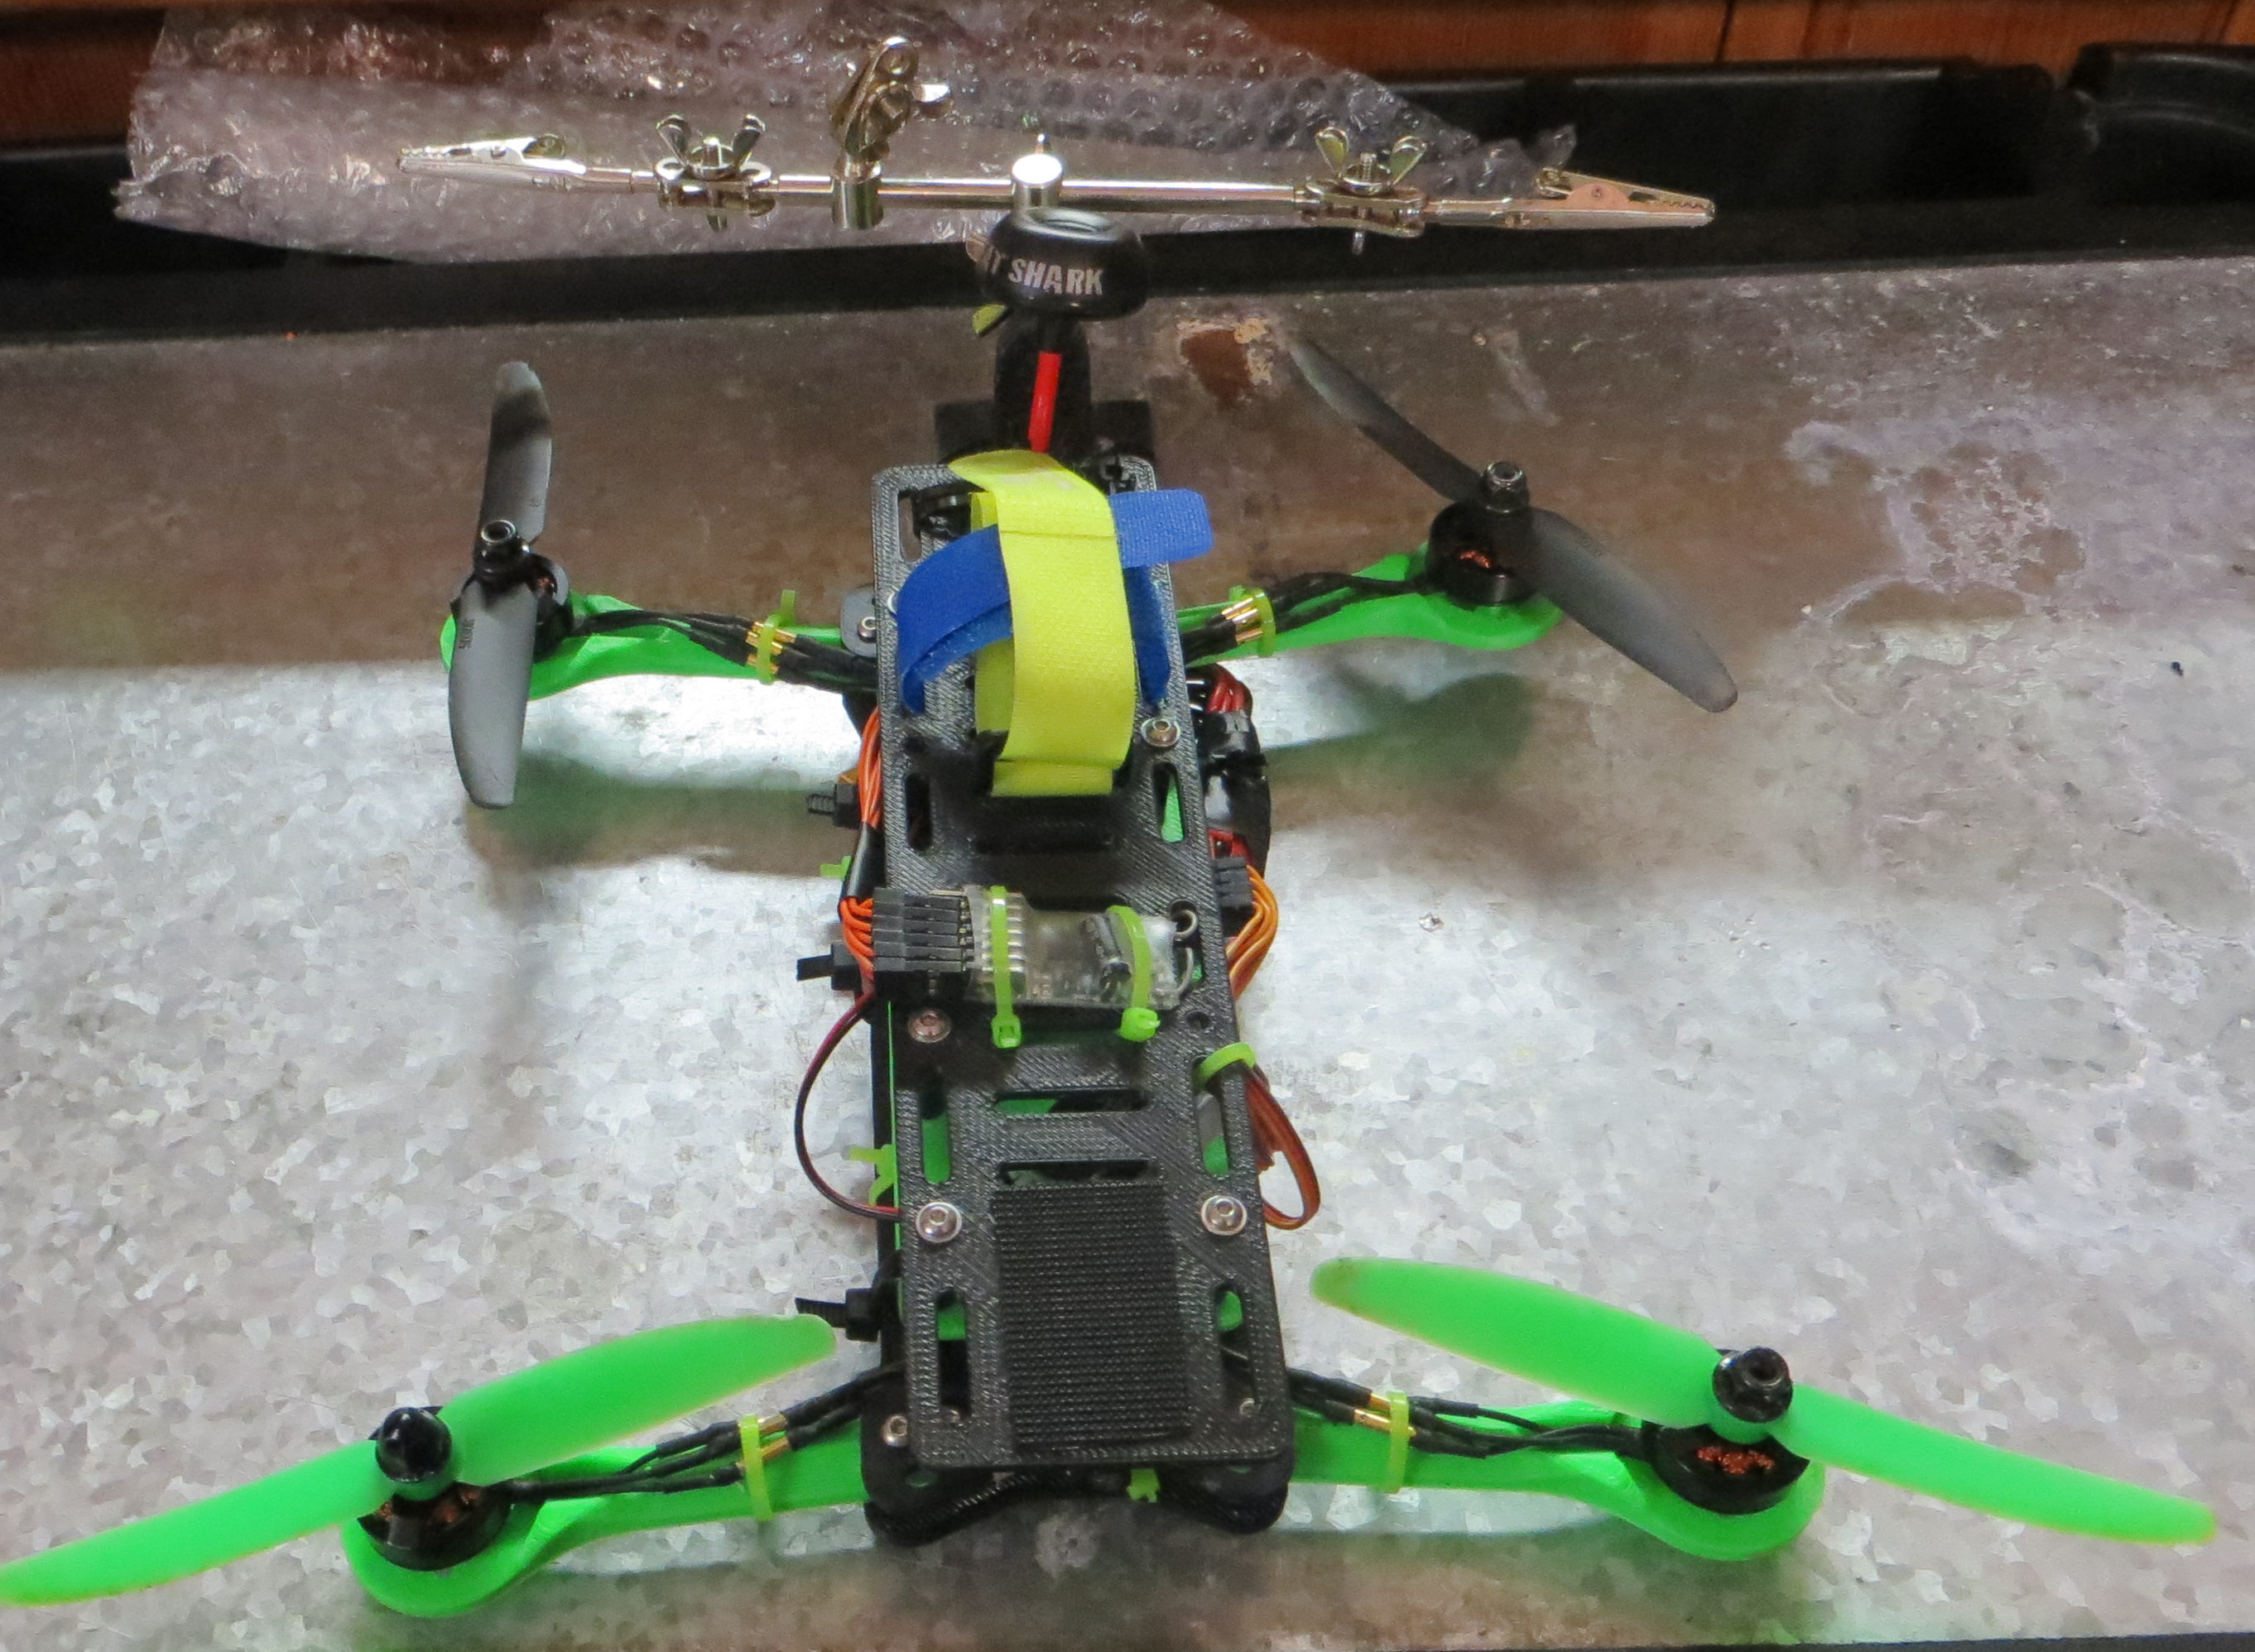
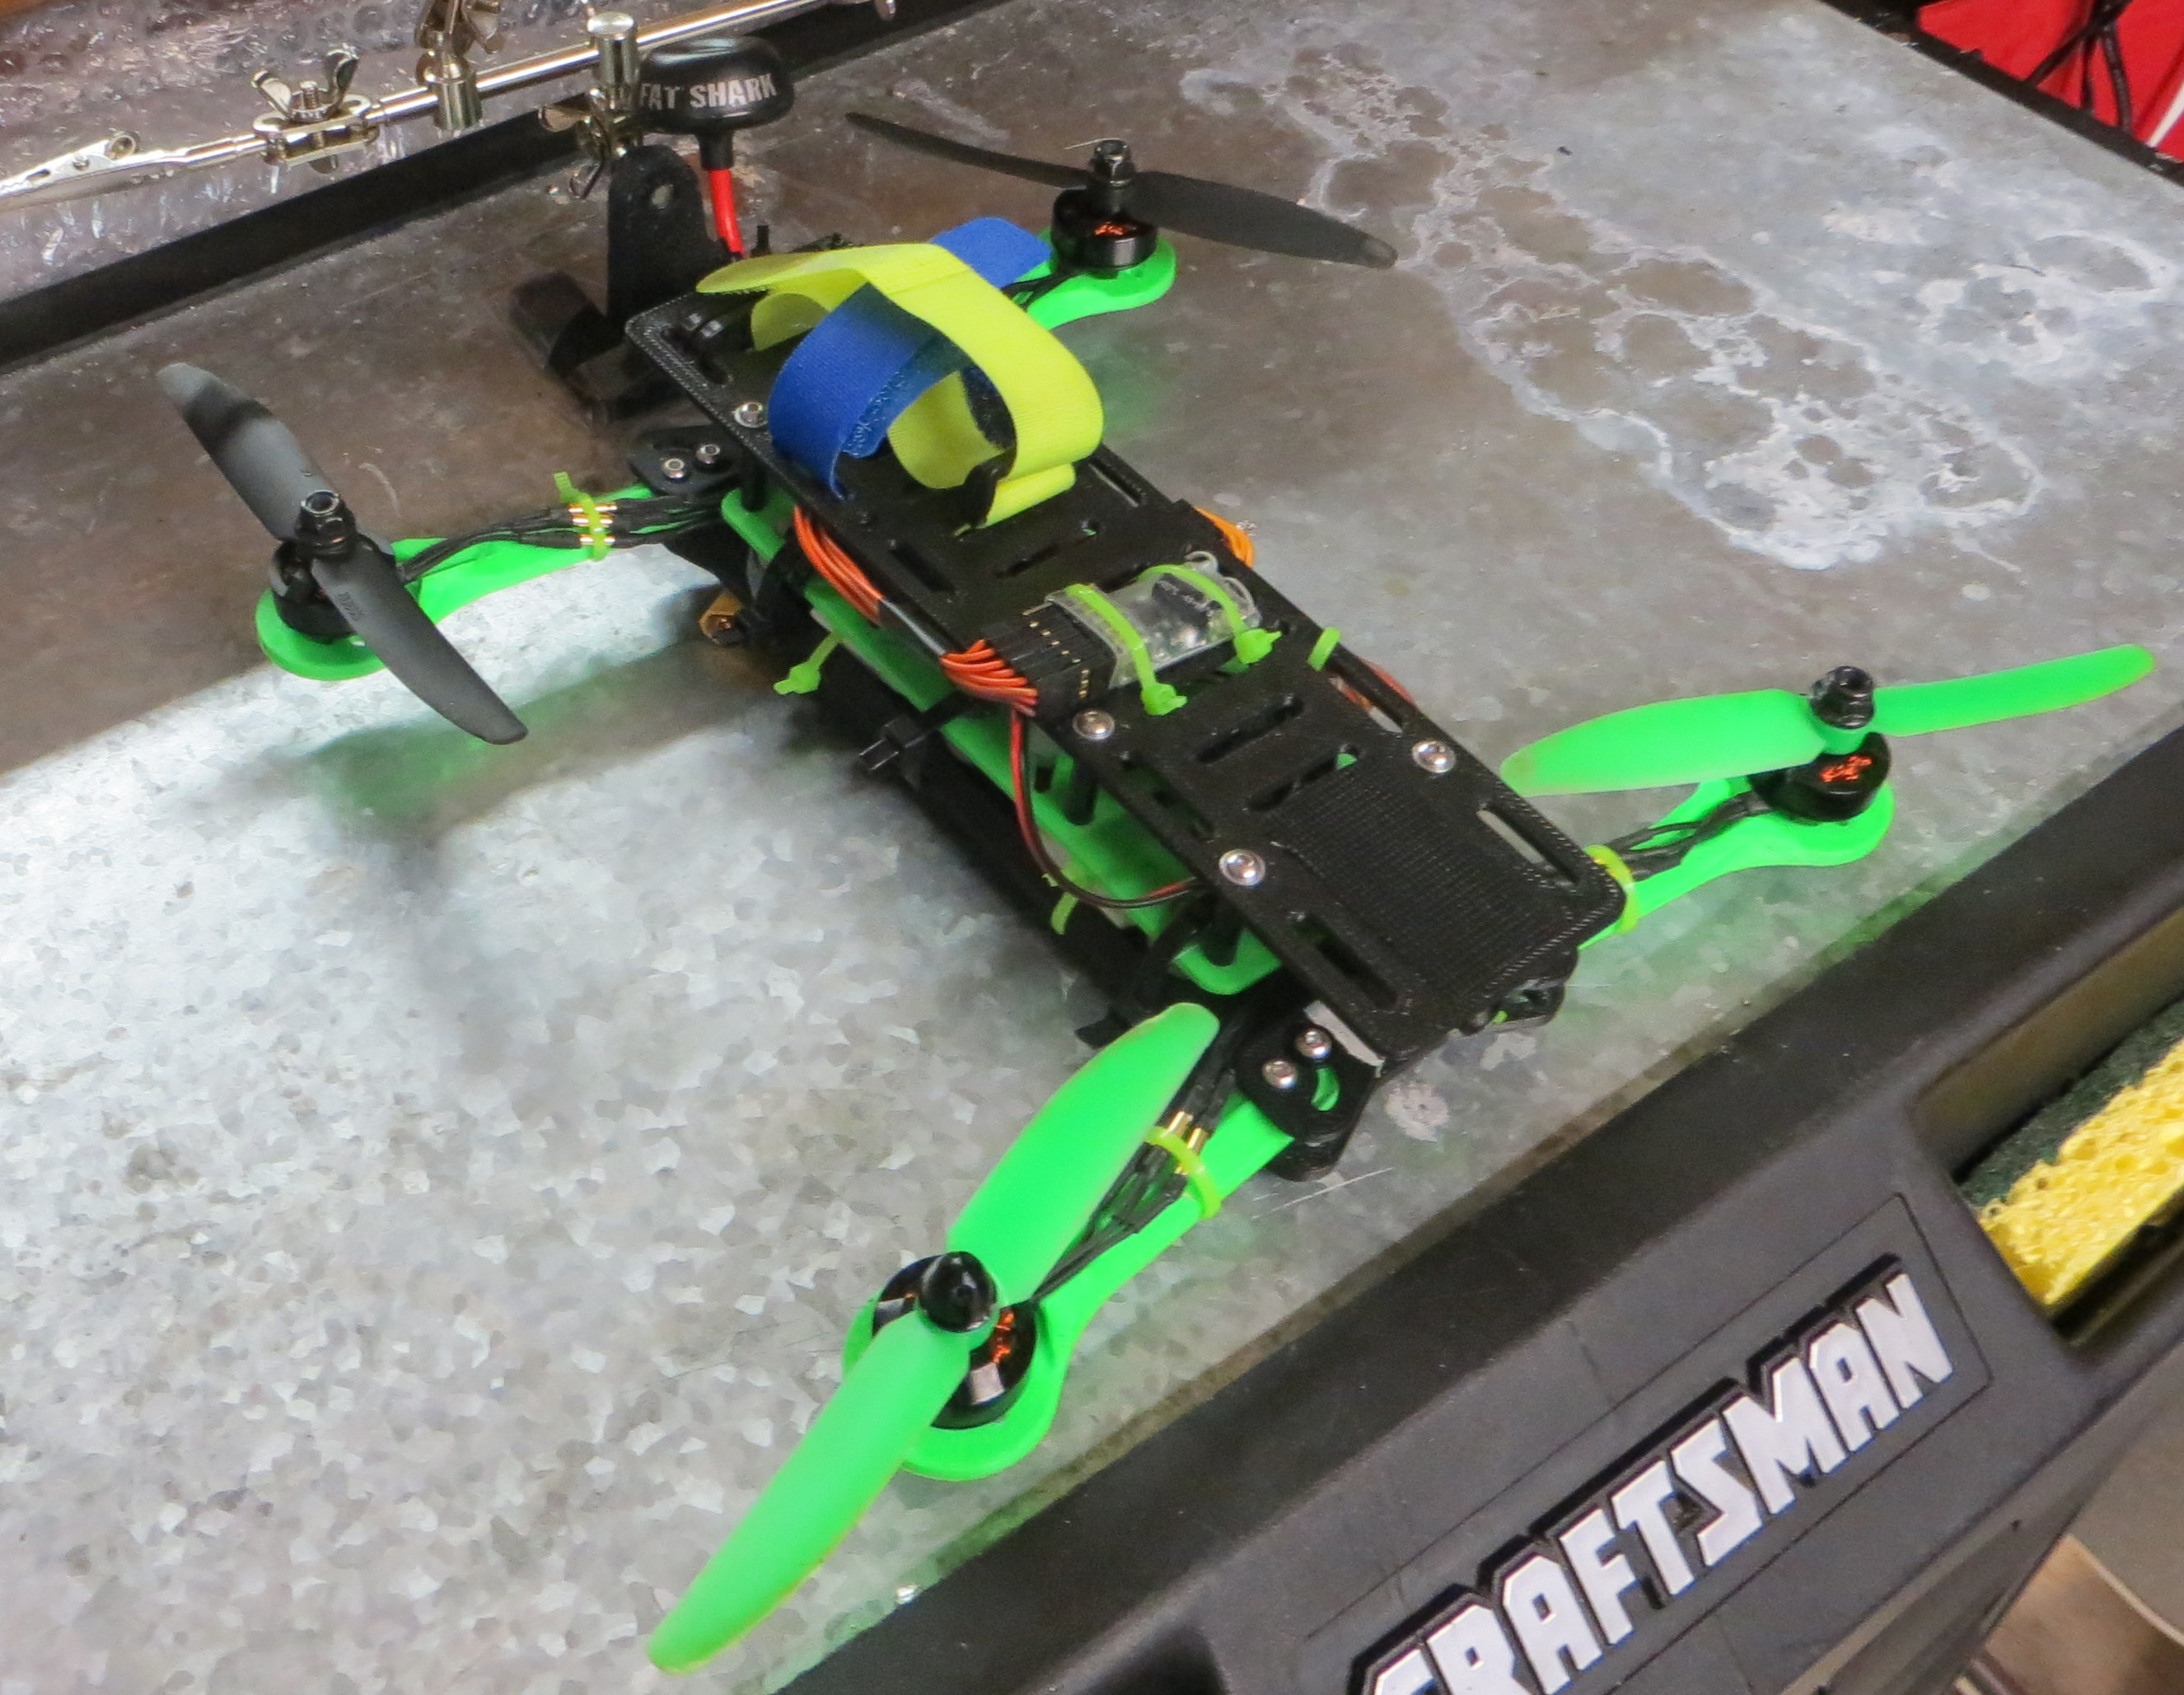
The other quad that I built this summer is the BLACKOUT quad that finally came in from Australia. This build was the most intensive one I’ve had to do yet just because everything has to fit into the tiny frame. There is almost no extra space for anything non-essential in there and I couldn’t use bullet connectors with the ESC’s so everything is solder directly. You can check out my build log on the flite test forums.Here are a two in progress build gif’s I made.
That’s most of my summer minus work and few other personal projects. One of which I will be doing a small post on soon. I have done a few more flight videos since I last posted about my MHQ quad that can all be found on my youtube channel.
So a while ago I came across this cool looking 3D printed quad frame from hovership. When I was looking to do another quad build and after the success of my other 3D printed frame I decided to order it and start my next quad build. I have had it build and have flown it for over or close to a month now and decided to review it for the hovership site. Below is my review of the quad frame so far but before that a few videos of my FPV flights.
These are my two most recent videos. I have a long way to go until I fly at the level as many other flyers on YouTube, but my skill seem to be improving. I have a few more videos on my page as well as some flights from my other quad. My thoughts on the quad are as follows.
3D Printed Foldable Awesomeness
The MHQ was my second build of a multi-rotor and my second purchase of a 3D printed frame. The quality of the 3D parts are great and with the included accessories it all comes together nicely and feels very sturdy. It has been a great flier for me since I built it a few weeks ago, I do however have two issues with it.
The first is the legs that are included with the kit are not that strong unless you have perfect landings all the time. As another reviewer has noted they are a bit weak and broke for me on my second set of flights. Since then I have broken all the legs off with the middle section still screwed on. Also the antenna mounting plate broke as well so I just zip tie the antenna to the camera deck now.
My second issue is the vibration dampeners while awesome and a great way to separate parts of the quad, where impossible for me to pull through the flight controller deck. It could be my 12amp T-motor ESC’s are just to thick but I could not push them through. I could get one or two on the edges maybe but the rest where not going through. In the end I just zipped tied the two together with the dampeners in between to keep it all together and it flies well.
After a few weeks of flying it has survived all the crashes I have put it through. The best thing for me so far has been the fordable arms. I have on many occasions clipped branches and fences and gone down only to find a dirty quad with an arm or two pushed in. They also make it handy for traveling. The only part that has seen any real damage is a small chip on the front arm plate from me going head first into a fence. (I was trying to pull up.)
Overall I have to say I’m very happy with my quad so far, it’s size and fold-ability has been a real plus for me. The guides help a new builder like me to put it together with no issues at all minus having to use some extra screw to mount the motors. I made a short build log on the flite test forums with videos and some of my fpv flights (new flier alert!) on my YouTube channel G2BPro. I would recommend this frame for any one looking to get good durable frame at a reasonable price.
My Build:
MHQ Frame
12amp T-motor ESC’s
RCX 1804 Motors
Acro naze 32
JST to XT60 distribution cord
micro spektrum compatible dsm2 receiver
altitude rc transmitter
5.8 GHz SpiroNET Omni Antenna
RMRC-MINI-V2
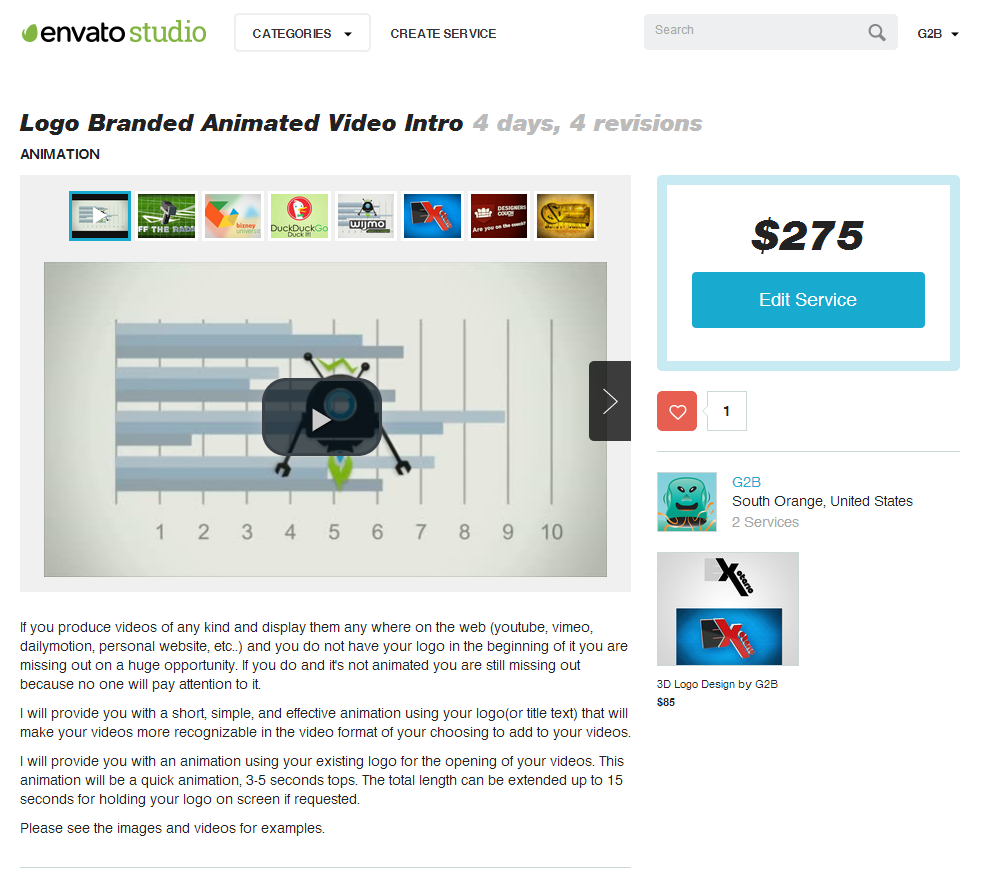
Last year I posted about a service I offer through Envato’s Envato studio, formerly microlancer , for 3D logo design. Recently they started a new category for animation and as an animated I thought it would be good to add another service that I would actually like to do. So I created, submitted, and had approved , Logo Branded Animated Video Intro.
I actually submitted this a while ago to their YouTube design section but it got rejected being more than just design. So I rewrote my description and brief outlines and submitted it again and it was accepted. The service details can be found on the page if you would like to use it.
The scope of work that can be offered though this service might seem a bit limited to some so, but for people who are just starting on YouTube or other video platforms and want something professional looking and to get work done through a trusted service I think this is the best way to go. And any one can always contact me directly as well for any projects.
So it seems I have neglected this space for almost another 2 months but I have made posts just now here… So as I mentioned in my last post I have recently been focusing all of my extra time on Quadcopters, Multi-Rotors, Drones, what ever name you like or hate to call them.
If you would like to follow my flying journey you can check out my blog on the flitetest. I’ve posted videos of my flights as well as recording the build of my first quad. Here’s the video of my first test flight.
It’s pretty cool being able to build something and have it actually work out and fly in the end. I’m planning on doing a larger post to recap my Multi-Rotor experiences so far that I will be posting here first so stay tuned for that.